

 I have 2 tips for you today as we continue the Tools of the Trade Stitch Along. Hope you’re having fun!
Tip #1
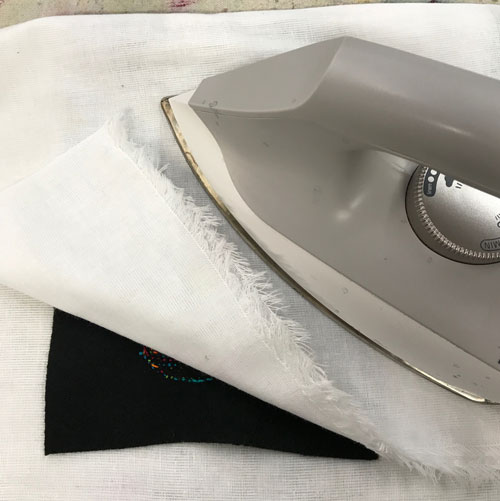
The base fabric used in hand embroidery may get distorted when embroidering without a hoop. The edges become skewed and out of square or you get swells and waffles. In our Tools of the Trade project, concentrated areas of stitching (like the tools) may draw up the fabric creating wrinkles and puckering the design.
You can embrace the wonky edges of a design or rev up your steam iron. Here’s how to flatten the fabric.
- Turn the embroidery over (face down) and cover it with a dry pressing cloth.
- Apply a steam iron to the fabric to flatten it out. It may be necessary to tug on the embroidery carefully to flatten the wrinkles out while ironing.
- If you want squared up edges, now’s the time to trim them square. Do it before adding stitchery to the background.
Tip #2
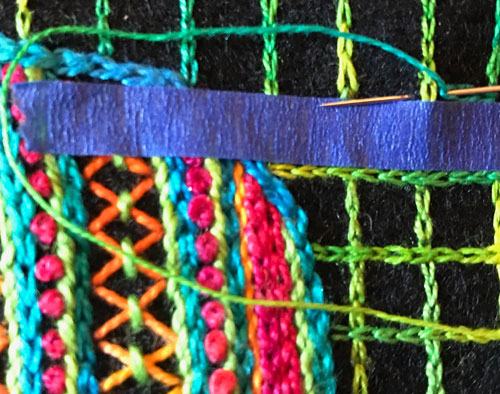
How do you embroidery a straight line on fabric if there is no line marked on the fabric? Use “painter’s” tape like this 1/4” blue tape found online or at your local hardware store to stitch straight lines. It has a low tack and will stick to the fabric but can be removed without leaving a residue.
- Place a strip of the tape on the fabric from the beginning of the stitch line to where you want the line to end.
- Press the tape firmly into place on the fabric. Stitch a Stem Stitch, Chain Stitch, or other linear stitch right next to the tape line.
- Gently remove the tape when the stitching is complete.
And now on to the next steps in our project.
Please Note: You’ll find steps on how to make the design added to the Tools of the Trade Stitch Along page as we go. It’s all free and you can join at anytime.
Step #12
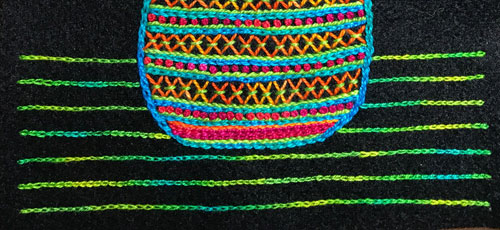
- Stitch 7 rows of Chain Stitches horizontally across the fabric to make the tablecloth. Begin the first row about 2″ up from the bottom edge of the fabric. Use a size 12 thread (like Lettuce) and a size 5 or 7 hand embroidery needle.
- Stitch each row to within 1/2″ of the edges of the fabric.
- To make a straight line, place a strip of painter’s tape on the fabric from the beginning of the stitch line to where you want the line to end.
- Press the tape firmly into place on the fabric. Stitch the Chain Stitches right next to the tape line.
- Gently remove the tape when the stitching is complete. Use the tape for the next line spacing it about 1/4″ below the first row of stitches.
- Continue to add rows to make a total of 7 rows of Chain Stitches.
Step #13

- Stitch rows of Chain Stitches vertically across the fabric to make the checkerboard tablecloth. Use the same thread as the horizontal lines.
- Find the center of the design and begin the first row about 1/4″ to the right of the center line. Stitch between the base of the vase and bottom horizontal row to connect them.
- Space the next vertical stitch line 1/2″ to the right of the first vertical row. Continue stitching vertical lines across the tablecloth between the top and bottom horizontal rows. Space them 1/2″ apart to make boxes.
- Repeat the above steps on the left side of the tablecloth spacing vertical rows 1/2″ apart.
Step # 14
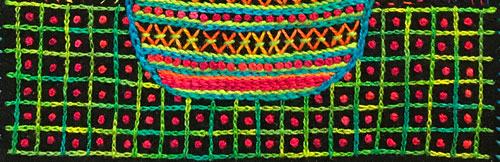
- Stitch French Knots in the center of each box on the tablecloth. Use a size 12 thread (like Red Hots).