
Working without a hoop when making free-form embroidery has its advantages. It may be easier on your hands if there is no hoop to grip while stitching. Improvised designs are more organic and less stiff-looking. And you can use fabrics like felt and wool that would be marked by the hoop leaving creases.
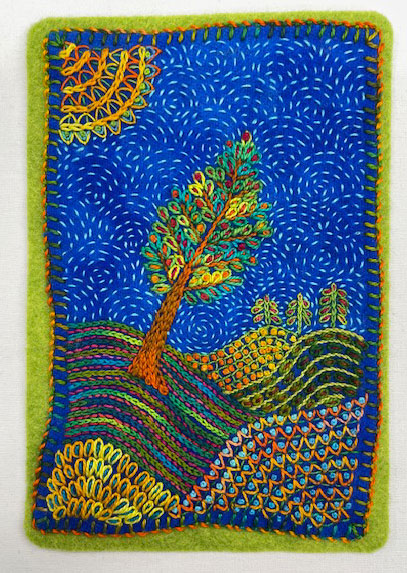
But there are also disadvantages when stitching fabrics without a hoop. The most obvious is that the fabric will become distorted like this example on wool called Fine Line Tree #15. Intense stitchery in the area of the fields pulls the blue wool fabric skewing the edges. While less intense stitchery in the sky area maintains the original squared shape. My solution to square it up upon completion? Stitch it to a rectangular piece of green felt.

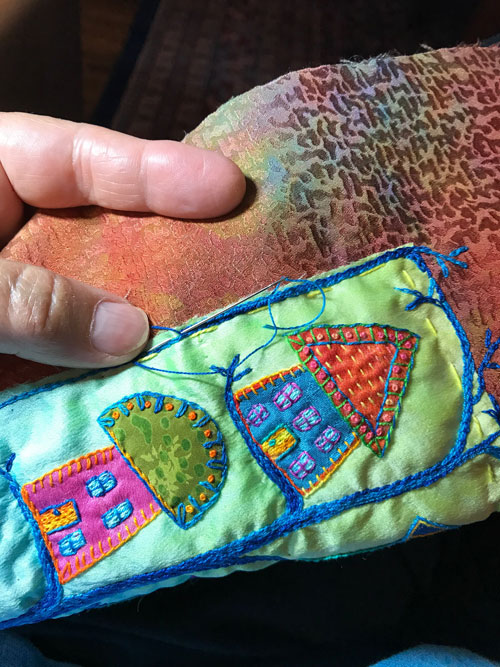
Here you see Bayeux Garden #2 another embroidery on wool that ended up with uneven edges. If the piece had only been slightly skewed, I could have flipped the embroidery over onto a thick felt pressing mat and tugged and steamed the edges square. Instead, I embraced the wonky and stitched it to a rectangle of yellow batik fabric that is backed with batting and later machine quilted.
So why not embrace the wonky? By embracing the wonky nature of the piece you acknowledge the “handmade” nature of the embroidery. No machine created these pieces of artwork. Human hands brought them into being.


