

 Ready to bring your Queen Poppy quilt to life?
With hand embroidery you’ll add texture and pattern to the quilt top. The stitches outline shapes and repeat colors used in the design. And the embroidery engages the viewer enticing them closer.
In short, hand stitchery brings the quilt to life and takes it from flat to fabulous!
(If you need to catch up, please visit the Queen Poppy Stitch Along page to create your quilt top.)
Step #7
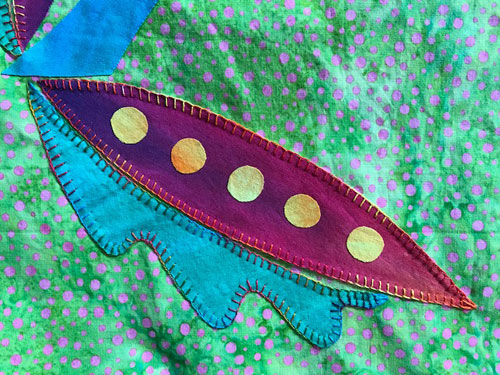
- Stitch a Blanket Stitch around the left leaf and bottom leaf. Use a size 12 pearl cotton thread (like Southwest Rainbow) and a size 5 hand embroidery needle.
- Stitch a Blanket Stitch around the edges of the left leaf center and bottom leaf center. Use a size 12 pearl cotton thread (like Sunrise).
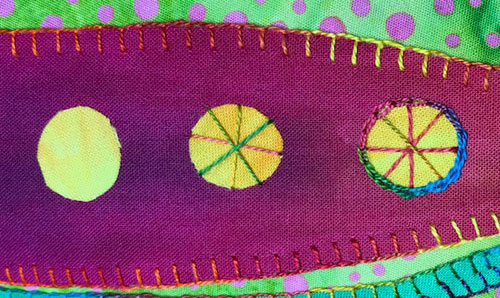
- Stitch 6 Straight Stitches across the dots on both leaves. Use a size 12 pearl cotton thread (like Southwest Rainbow).
- Use that same thread and stitch a Chain Stitch around each dot. Stitch on the leaf fabric and right next to the edge of the dot to outline the dot.
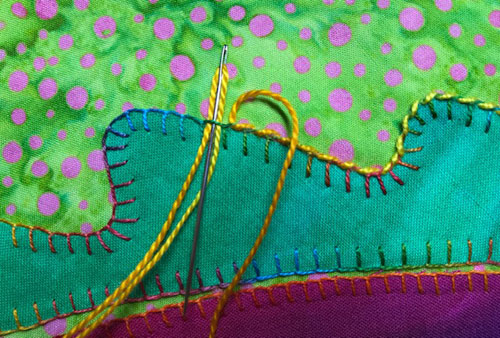
- Whip Stitch the Blanket Stitches around each edge of the left leaf and bottom leaf. Use a size 8 pearl cotton thread (like Butter).
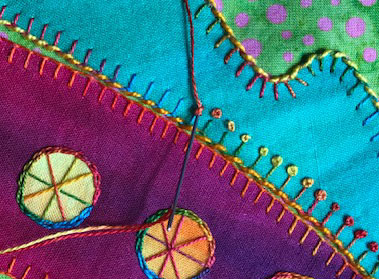
- Stitch French Knots on the tip of the Blanket Stitches on the left leaf and bottom leaf. Add the French Knots only on the inside arc of the leaves. Leave the outside wavy edges of the leaves free of knots. Use a size 12 pearl cotton thread (like Southwest Rainbow).