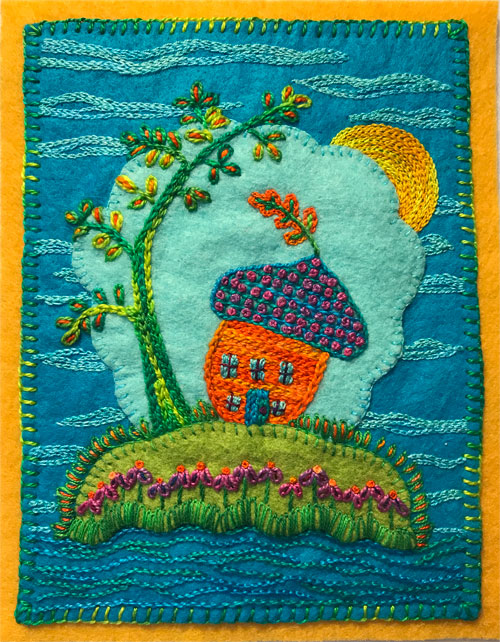
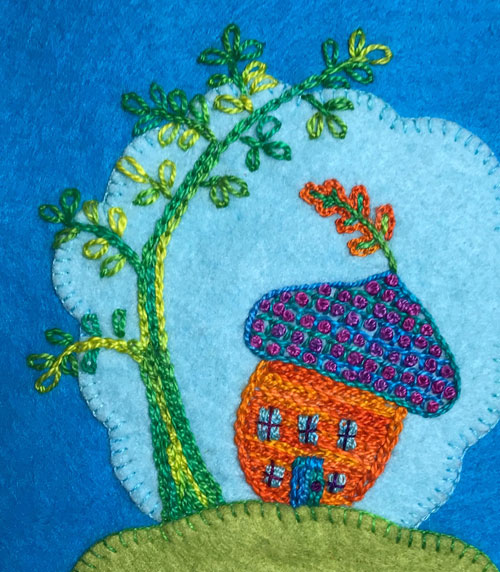
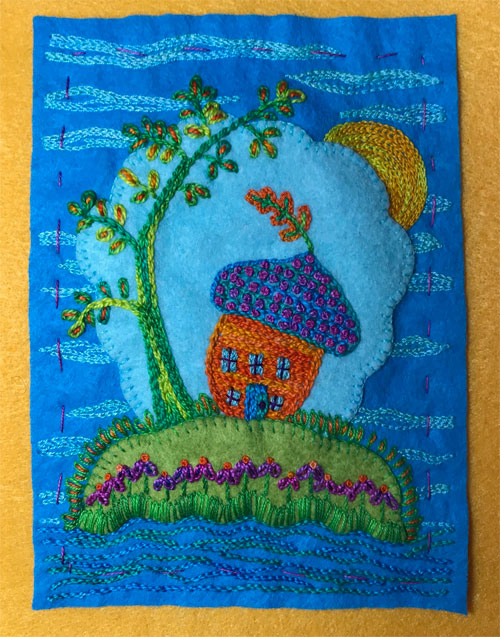
This is a replica of my friend Frieda Anderson’s home. Yes, it is a nut house, but that does not reflect Frieda or her family. It is made with felt fabrics and measures about 5″ x 6.5″ when complete.
Step #1
Click here for a Frieda’s Nut House Stitch Kit or assemble the following items:
- Felt made with at least 25% or 35% wool (or other fabric of your choice) in the following colors:
- Turquoise 4.5″ x 6″ for the background
- Light blue 4″ x 4″ for the sky
- Pea green 4.5″ x 2″ for the ground
- Yellow Gold 6″ x 8″ for the backing
- Sewing thread for transferring the pattern shapes (or used the green size 12 below)
- Tracing paper for transferring the pattern shapes
- Size 8 pearl cotton threads in these variegated colors: orange, turquoise, lavender pink, green
- Size 12 pearl cotton threads in these variegated colors: light blue, purple, yellow, green, orange
- Size 3 and 5 hand embroidery needles
- Download and print out this Word document of the Frieda’s Nut House pattern. Or print out this PDF of the Frieda’s Nut House pattern.
Step #2
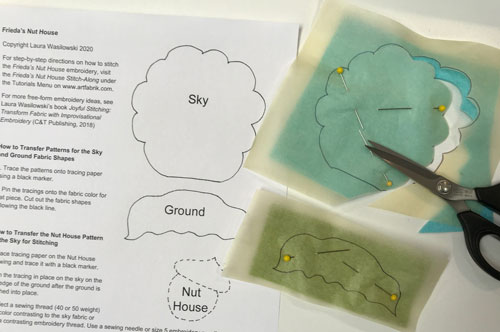
- Download and print out this Word document of the Frieda’s Nut House pattern. Or print out this PDF of the Frieda’s Nut House pattern.
- Trace the sky and ground pattern using tracing paper and a black marker.
- Pin the traced patterns on the respective fabrics and cut out the shapes.
Step # 3
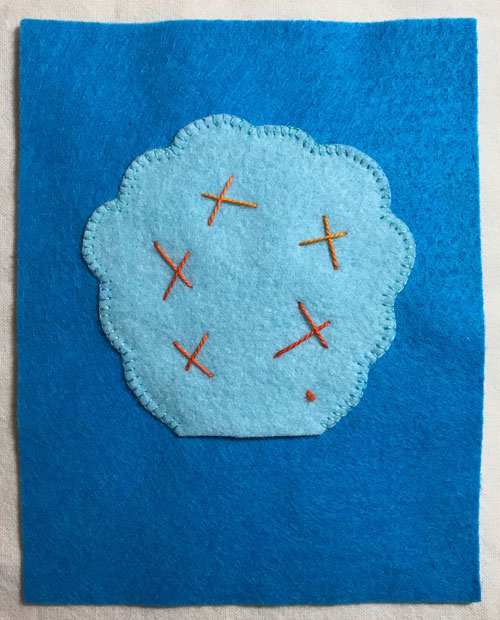
- Center and pin the sky shape about 1 1/2″ up from the base of the background fabric.
- Stitch tack into place and remove the pins.
- Stitch Blanket Stitches around the edge of the sky shape. Leave the bottom edge free of stitches. Use a size 12 thread and a size 5 or 7 embroidery needle.
- Remove the tacking stitches.
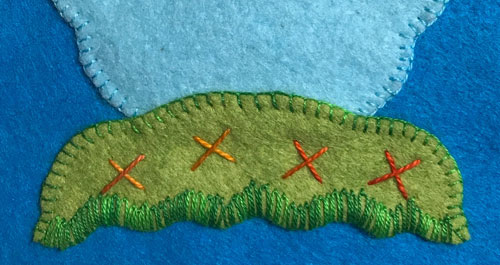
- Center and pin the ground shape about 1/4″ over the lower edge of the sky.
- Stitch tack into place and remove the pins.
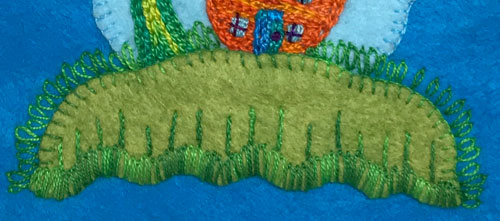
- Stitch Blanket Stitches around the side and top edges of the ground shape. Use a size 12 thread.
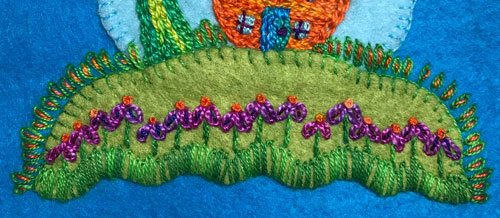
- Stitch Lazy Daisy Stitches around the lower edge of the ground to make leaves using the same color of thread.
- Remove the tacking stitches.
Step #4
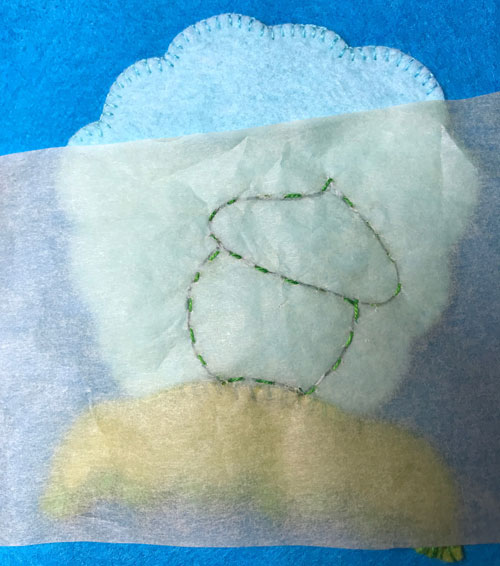
- Trace the nut house pattern shape onto tracing paper using a black marker.
- Position the tracing paper on the crest of the ground fabric and pin into place.
- Follow the black marker lines and stitch an outline of the design on the fabric using Running Stitches. Use a sewing thread (40 or 50 weight) in a color contrasting to the background fabric and a finer needle, like the size 5 embroidery needle. Or use one of the size 12 threads that is used later for the hand embroidery.
- Remove the paper after the outline of the design is stitched by scoring the paper next to the stitches using the tip of a pin. Gently rip away the paper. Try not to pull the running stitches and distort the design.
- These stitches define the edges of the design and will be removed after stitching the shapes.
Step #5
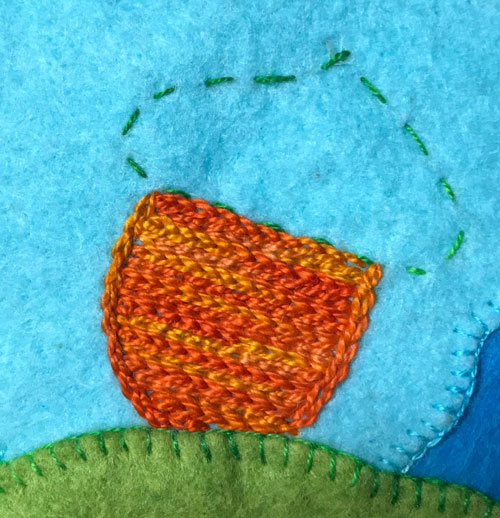
- Stitch Chain Stitches to outline the nut shape following the Running Stitches. Use a size 8 pearl cotton thread and a size 3 embroidery needle.
- Stitch Chain Stitches horizontally in close rows across the nut shape to fill it in using that same color of thread.
Step #6
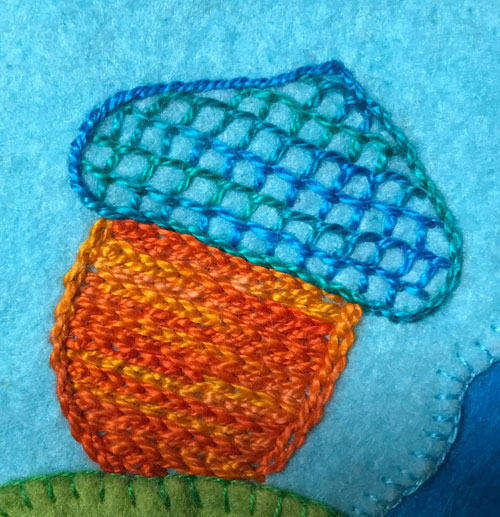
- Stitch Stem Stitches to outline the roof shape following the Running Stitches. Use a size 8 pearl cotton thread.
- Stitch Blanket Stitches horizontally across the roof shape. Begin at the base of the roof and face the stitches, so the tines of the Blanket Stitches touch the stem stitches that outline the bottom of the roof.
- Continue to stitch horizontal rows of Blanket Stitches up the roof making rows of box shapes.
- Remove the Running Stitches.
Step #7
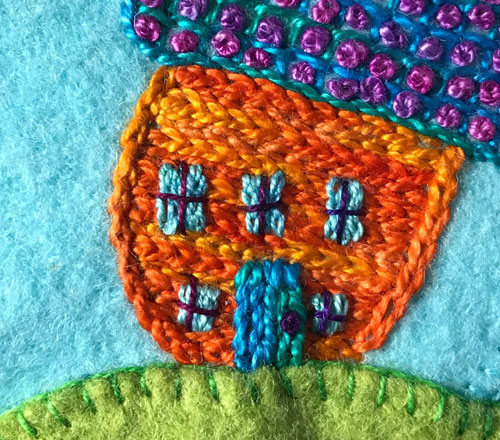
- Stitch a French Knot inside each box made by the blanket stitches on the roof. Use a size 8 pearl cotton thread.
Step #8
- Stitch Stem Stitches vertically and next to each other on the nut house to make a door measuring about 1/ 2” high. Use a size 8 pearl cotton thread and a size 3 embroidery needle.
- Stitch a French knot on the door to make the doorknob. Use a size 12 thread and a size 5 or 7 embroidery needle.
- Stitch Straight Stitches vertically and next to each other on the house to make 5 windows. Use a size 12 thread.
- Stitch Straight Stitches to make a plus sign shape on the windows to create window panes. Use a size 12 thread.
Step #9
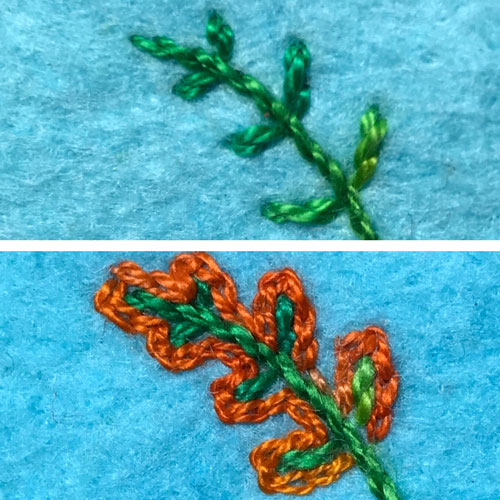
- Stitch Stem Stitches vertically from the tip of the nut house roof to make the stem of a leaf Use a size 12 thread.
- Using that same color of thread, stitch Stem Stitches from the stem out at an angle to create 6 veins for the leaf.
- Stitch Chain Stitches around the stem and veins to make the leaf shape. Use a size 12 pearl cotton thread.
Step #10
- Stitch Chain Stitches in an arc from on the left of the nut house from the ground up to the top of the sky to make the tree trunk. Use a size 8 pearl cotton thread.
- Using that same thread, stitch a line of Stem Stitches measuring about 1/4″ long from the tip of the Chain Stitches to create a branch.
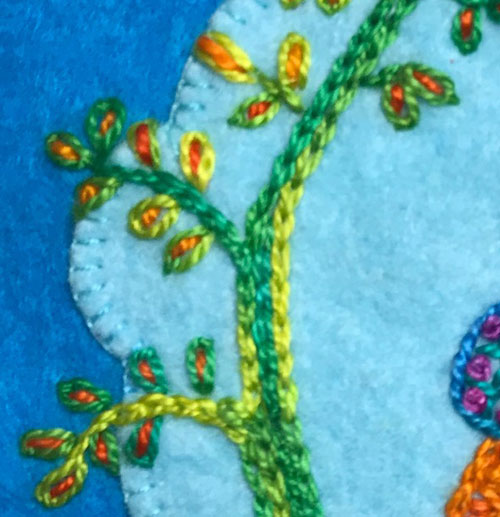
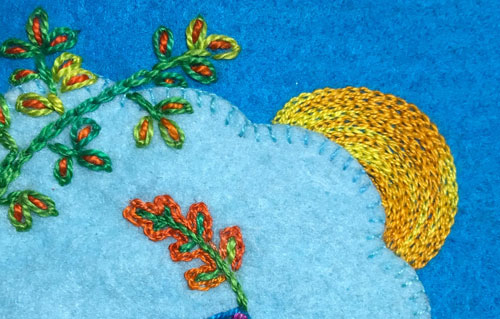
- Stitch Lazy Daisy Stitches off the Stem Stitches to create leaves.
- Add 4 more sets of branches and leaves down the length of the tree top.
- Stitch Chain Stitches from the last treetop branch down to the ground next to the first row of Chain Stitches.
- Continue to add branches and leaves to the tree trunk. Make thicker, lower branches with Chain Stitches.
- Add more rows of Chain Stitches to make the base of the tree trunk wider.
Step # 11
- Stitch Straight Stitches inside each Lazy Daisy leaf. Use a size 8 pearl cotton thread.
Step #12
- Stitch Lazy Daisy Stitches vertically across the top of the ground to form leaves. Use a size 12 thread and a size 5 or 7 embroidery needle.
- Stitch Stem Stitches vertically from the top of the row of Lazy Daisy stitches on the bottom edge of the ground to form flower stems. Use the same color thread as above.
Step #13
- Stitch Straight Stitches inside each Lazy Daisy leaf on the top of the ground. Use a size 12 pearl cotton thread.
- Stitch 2 Lazy Daisy Stitches at an angle on the tip of each flower stem to form flower petals. Use a size 8 pearl cotton thread and a size 3 embroidery needle.
- Stitch a French Knot on top of each flower. Use a size 12 pearl cotton thread.
- Stitch Straight Stitches inside each flower petal. Use a size 12 thread.
Step #14
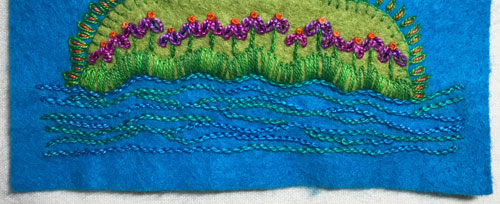
- Stitch Stem Stitches horizontally and in curvy lines across the bottom edge of the fabric to make waves of water. Use a size 8 pearl cotton thread.
- Stitch the waves to within 1/4″ of the sides and bottom edges of the fabric.
Step #16
- Stitch Chain Stitches in a large arc across on the background fabric from the upper edges of the right side of the sky to make the sun. Stitch the arc to measure about 1 1/2″ in diameter making the outline of the sun. Use a size 12 thread and a size 5 or 7 embroidery needle.
- Continue to stitch Chain Stitches in rows right next to each other following the same arc to fill in the sun shape.
Step #17
- Stitch wavy rows of Chain Stitches horizontally across the background fabric to make clouds. Use a size 12 thread.
- Stitch the clouds to within 1/4″ of the sides and top edges of the fabric.
Step #18
- Carefully trim the background fabric square if necessary, leaving a scant 1/4″ of fabric around the edges for stitching the design to the backing fabric.
- Center and pin the embroidery to the backing fabric.
- Stitch-tack the embroidery onto the backing fabric.
Step #19
- Stitch Blanket Stitches around the edge of the background fabric attaching it to the backing fabric. Use a size 8 pearl cotton thread and a size 3 embroidery needle.
- Trim the edges of the backing fabric to within 1/4″ of the background fabric.
- Label your embroidery with your name and date.
- Congratulations on making your nut house!

