A Free Tutorial
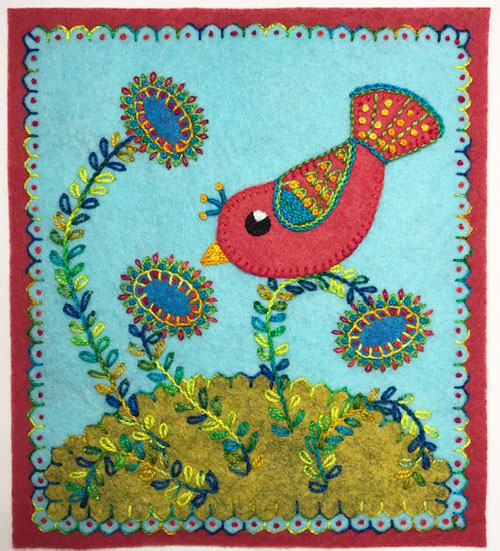
Red Bird depicts the migrating birds in my neighborhood. (I live in a rather colorful region of the country.) It is made with felt fabrics, is hand embroidered, and measures about 6″ x 7″ when complete.
Step #1
Click here for a Red Bird Stitch Kit or assemble the following items:
- Felt made with at least 25% or 35% wool (or other fabric of your choice) in the following colors:
- 6 1/2” x 9 1/2” medium red for bird and backing
- 6” x 7” light blue for the sky
- 2.5” x 6” green for the grass
- 2” x 3” blue for the flowers
- Sewing thread for transferring the pattern shapes (or used the black or white size 12 below)
- Size 8 pearl cotton threads: variegated green, green, yellow, and turquoise
- Size 12 pearl cotton thread: red, black, and white
- Size 3 and 5 hand embroidery needles
- Pinking blade for the rotary cutter or pinking shears
- Tracing paper for transferring the pattern shapes
- Download and print out this Word document of the Red Bird pattern. Or print out this PDF of the Red Bird pattern.
Step #2
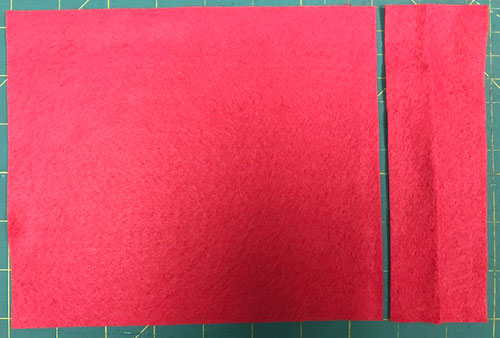
- Trim 2” from the long side of the bird and backing fabric to make a rectangle for the bird to measure 2” w x 6 ½” h and a rectangle for the backing to measure 7 ½” w x 6 ½” h. Set the larger backing fabric aside.
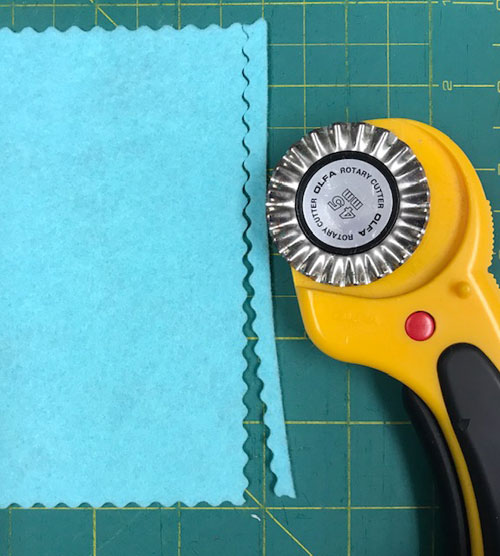
- Trim 1/4” from each edge of the sky fabric using a pinking blade or pinking shears.
- Learn how to load the pinking blade on your rotary cutter here: How to Load Decorative Blades onto Rotary Cutter Handles.
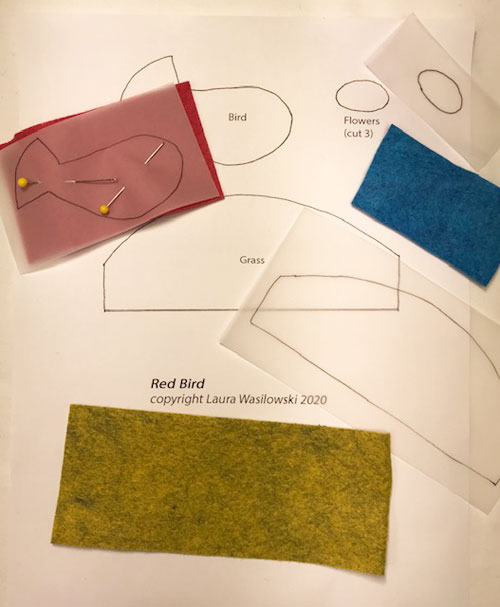
- Download and print out this Word document of the Red Bird pattern. Or print out this PDF of the Red Bird pattern.
- Trace the patterns for the grass, bird, and flower onto tracing paper.
- Pin the tracings onto the respective fabrics and cut out the shapes.
- For the flowers, cut out 1 and use that as a template to cut out the remaining 2.
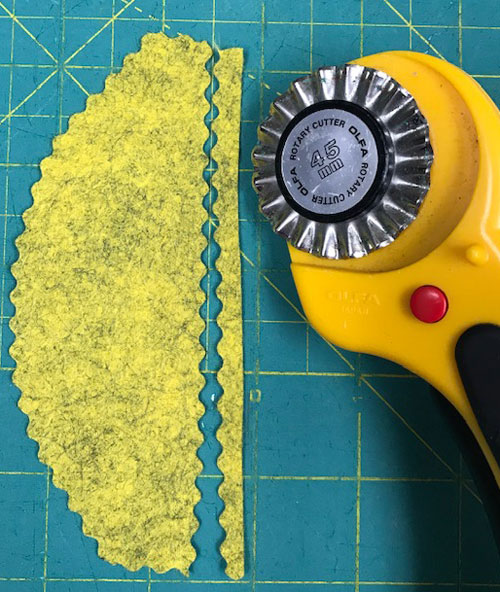
- Trim about 1/4” from each edge of the grass fabric using a pinking blade or pinking shears.
Step #3

- Place the sky fabric vertically.
- Pin the grass fabric about 1/4″ in from the two sides and the bottom edge of the sky. Stitch tack the grass shape into place using a fine sewing thread or a size 12 pearl cotton.
- Stitch Fly Stitches around the pinked edge of the grass shape. Use a size 8 pearl cotton thread and a size 3 hand embroidery needle.
- Remove the stitch tacking.
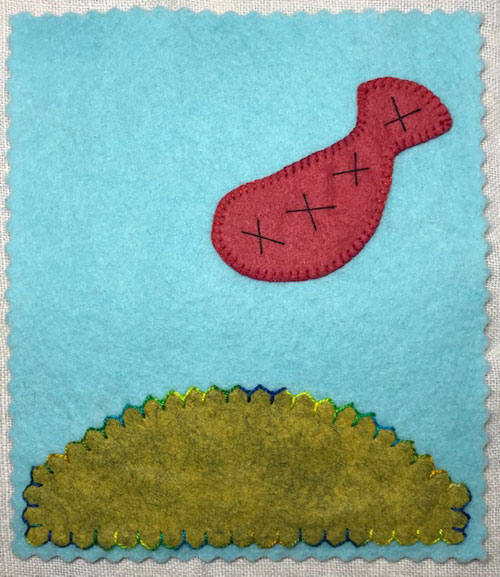
- Pin the bird at an angle with the front belly of the bird about 3 1/4” up from the bottom of the sky and the tail tip about 1/2” in from the right side of the sky. Stitch-tack the bird into place.
- Stitch Blanket Stitches around the bird shape. Use a size 12 pearl cotton thread and a size 5 hand embroidery needle.
- Remove the stitch tacking.
Step #4

- Stitch Chain Stitches in a circle about 3/8″ across on the bird’s head to make the eye.
- Use black size 12 pearl cotton thread and a size 5 hand embroidery needle.

- Fill in the eye shape with a spiral of Chain Stitches. Start on the outside edge of the eye circle and work your way into the center.

- On the top edge of the eye, stitch a Straight Stitch from the outside edge to a point in the center of the eye. Use the white size 12 pearl cotton thread.
- Continue to add straight stitches beginning at the outside edge of the eye and returning to that same point in the center of the eye. Build up a wedge of white thread to create the highlight in the eye.
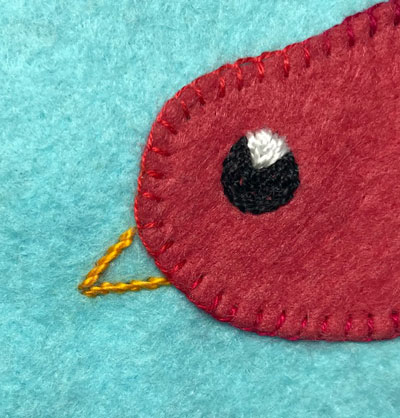
- Stitch 2 lines of Stem Stitches on the sky fabric from the front edges of the bird’s head to form a triangular shape for the beak. Use a size 8 pearl cotton
and a size 3 hand embroidery needle.
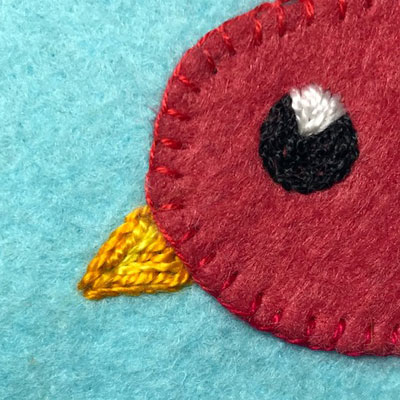
- Stitch Stem Stitches in parallel horizontal rows starting from the outside and working in to fill in the beak using that same thread.
Step #5
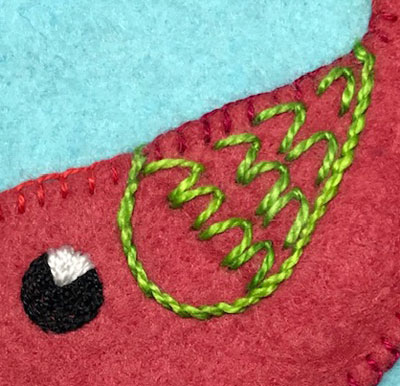
- Stitch Stem Stitches from the top edge of the bird’s body down and then up to the beginning of the top edge of the tail. Stitches should form a C shape or the shape of half of a heart. This is the outline of the bird’s wing.
- Use a size 8 pearl cotton thread and a size 3 hand embroidery needle.
- Stitch 4 rows of Fly Stitches across the wing using that same color of thread. Leave about 1/2″ free of stitches on the front or cap of the wing. Point the Fly Stitches toward the tip of the wing.

- Whipstitch that same color of thread through the Blanket Stitches on the top of the wing and around to the bottom edge of the tail.
- To whip the edge of a Blanket stitch, bring the needle and thread up at the beginning of the blanket stitches. Insert the blunt end or eye end of the needle under the first line of the blanket stitch. Draw the thread through the blanket stitch.
- Continue to insert the needle and draw the thread under each consecutive stitch. Always pass the needle under the stitch in the same direction.

- Stitch 3 rows of Back Stitches vertically across the tail to make the tail feathers.

- Stitch French Knots inside each Fly Stitch on the wing. Use a size 8 pearl cotton thread.
- Stitch 4 rows of French Knots across the tail using that same color of thread.

- Stitch Stem Stitches in close horizontal rows to fill in the cap of the wing. Use a size 8 pearl cotton.
- Stitch Stem Stitches around the outside edge of the wing and the base of the tail using that same color of thread.
- Stitch Chain Stitches on the sky fabric next to and across the tip of the tail using that same color of thread.
Step #6
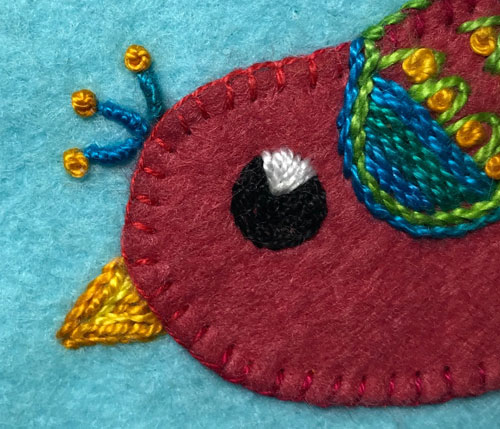
- Stitch 3 Bullion Knots at the top of the bird’s head to create the crest. Use a size 8 pearl cotton thread and a size 3 hand embroidery needle.
- Stitch a French Knot on the tip of each Bullion Knot. Use a size 8 pearl cotton.
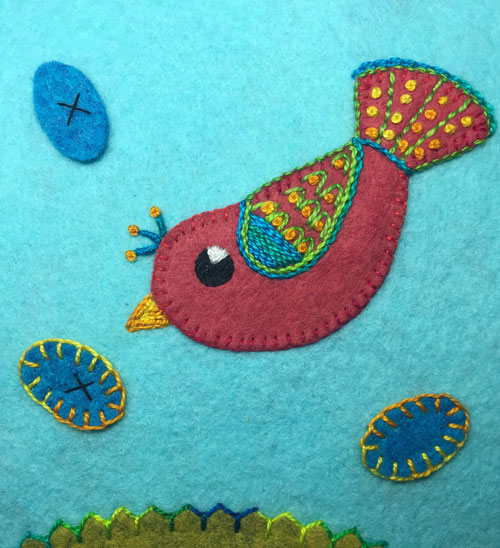
- Place the right flower about 2 1/4″ up from the bottom edge of the piece and 3/4″ in from the right side. Tilt slightly, pin, and stitch-tack into place.
- Place the left lower flower about 2 3/4″ up from the bottom edge and 1 1/2″ in from the left side. Tilt slightly, pin, and stitch-tack into place.
- Place the top flower about 5″ up from the bottom edge and 1 1/2″ in from the left side. Tilt slightly, pin, and stitch-tack into place.
- Blanket Stitch around each flower. Use a size 8 pearl cotton.
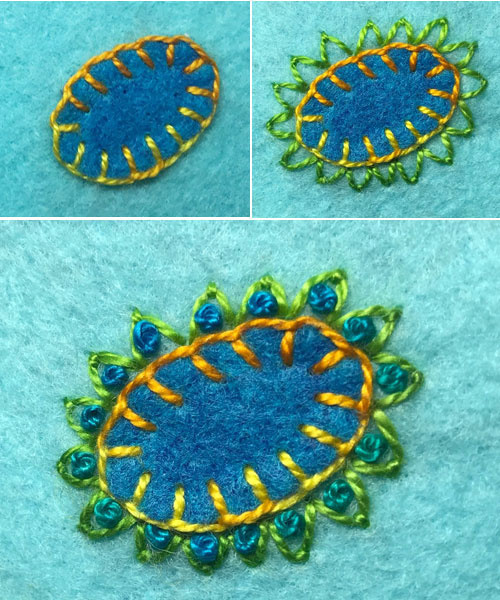
- Remove the tacking stitches from each flower.
- Stitch Fly Stitches around each flower on the sky fabric. Point the tips of the Fly Stitch out to make petals. Use a size 8 pearl cotton thread.
- Stitch a French Knot inside each Fly Stitch. Use a size 8 pearl cotton thread.
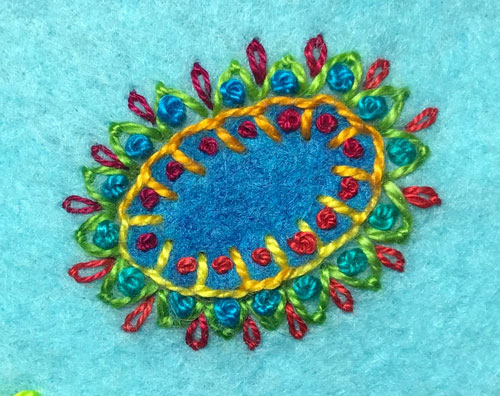
- Stitch a French Knot inside each tine of the Blanket Stitches on the flower. Use a size 12 pearl cotton thread and a size 5 hand embroidery needle.
- Using that same thread, stitch Lazy Daisy stitches on the sky between each Fly Stitch petal.
Step #7
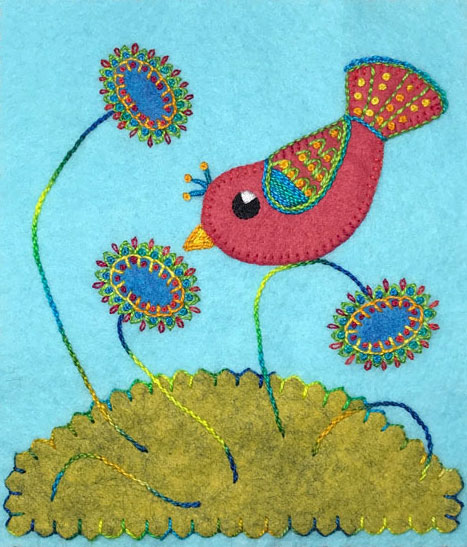
- Stitch Stem Stitches to create a curving stem from the flower base on the right up to the belly of the bird and down to the grass. This forms his perch. Use a size 8 pearl cotton thread.
- Using that same thread, stitch Stem Stitches curving from the base of the remaining 2 flowers to the grass.
- Stitch 2 more stems using that same thread curving across the grass.
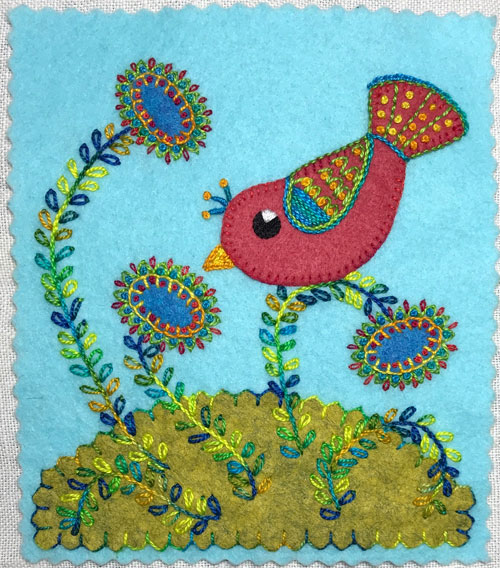
- Stitch Lazy Daisy Stitches on either side of each stem. Use a size 8 pearl cotton thread.
Step #8
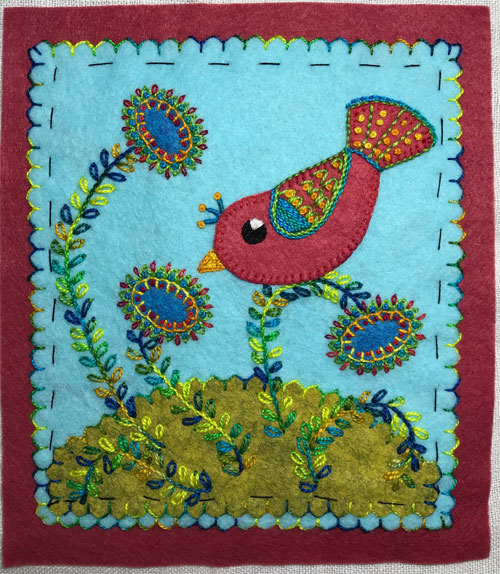
- Center the sky fabric on the red background fabric. Stitch tack into place.
- Stitch Fly Stitches following the pinked edge of the sky fabric while attaching it to the backing fabric. Use a size 8 pearl cotton thread.
- Remove the tacking stitches.
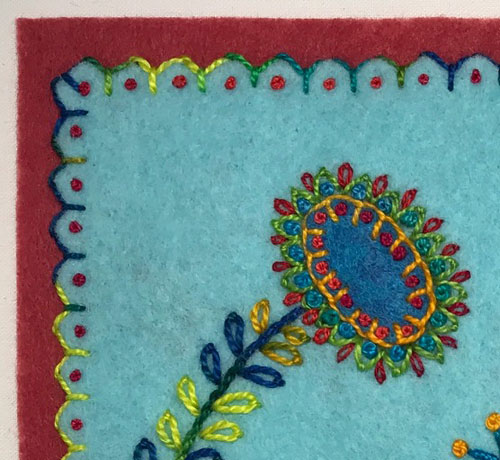
- Stitch French Knots inside each Fly Stitch on the border. Use a size 12 pearl cotton thread.
- Trim the background fabric to within 1/4″ of each edge of the sky fabric.

- Trim the red background fabric to square up the piece if necessary
- Thank you for joining me!
