

An Etui for Embroidery
If you enjoy hand embroidery as much as I do, then you need a small etui or sewing kit like this to hold your stitching essentials.
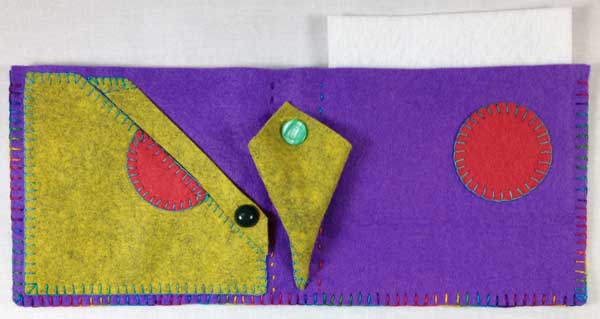
Made with felt, a stiff interfacing like Timtex, and only two hand embroidery stitches, this little etui measures about 5″ x 6″. It is a perfect traveling companion when you want to stitch on the road.
The written and illustrated directions for the Etui, are also found in Free-Form Hand Embroidery on Wool along with 5 other projects stitched on wool.
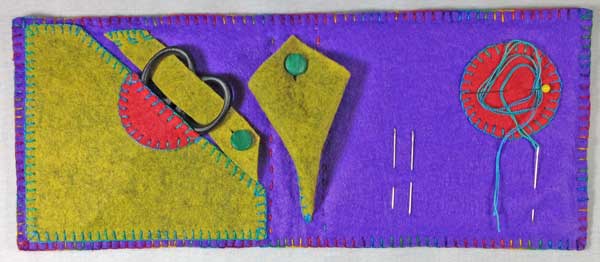 Inside, the etui holds your scissors, thimble, needles, and pins. All that is needed for a small, portable sewing kit.
Materials:
- 1 of 4.5” x 5” felt for scissors pocket and strap
- 2 of 5” x 12” felt for covers
- 2 of 4.25” x 5” Timtex or other stiff interfacing
- 1 of 3” x 3” felt for thimble holder
- 3 of 2” felt dots for scissors opening, thread keep, and decoration
- 1 of 1/2” felt dot for decoration
- 2 of 1/2” shank buttons
- Size 8 pearl cotton thread
- Size 3 or 4 embroidery needle
Directions
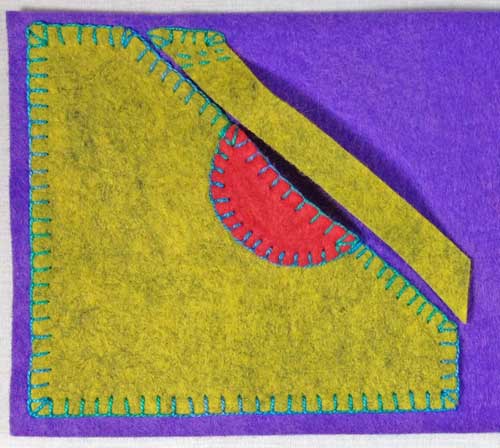
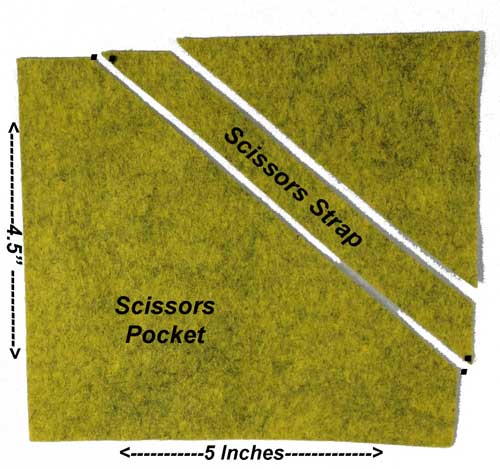 1. Place the felt for the scissors pocket so the 5” edges go horizontally. Place a mark 1” in from the top left corner of the felt and another mark 1” up from the bottom right side of the felt. Cut the felt from mark to mark. This makes the scissors pocket.
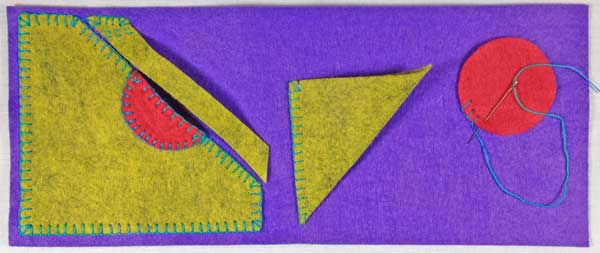
2. Cut a 1/2” strip from the long edge of the remaining triangle of felt to make the scissors strap.
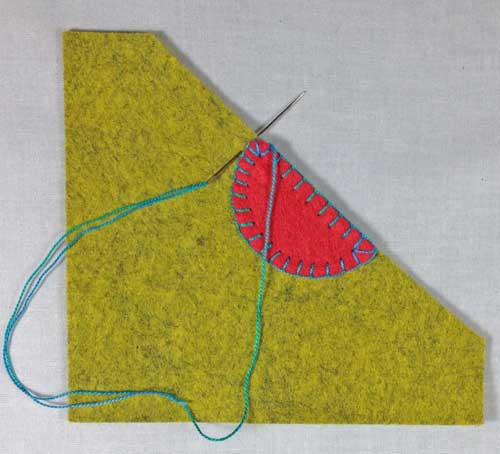 3. Cut one of the 2” felt dots in half. Center the dot onto the angled side of the scissors pocket. The dot indicates the opening for the scissors.
4. Blanket Stitch the dot to the pocket starting at the top left edge of the dot and continuing around the curve. Leave the needle in the felt.
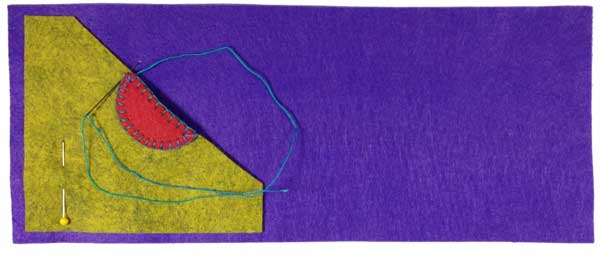 5. Place the scissors pocket onto the left side of the inside cover felt about 1/4” in from the outside edges and pin into place.
6.Take a few anchoring stitches into the cover felt at the left end of the dot to secure the scissors pocket to the cover.
 7. Blanket Stitch around the pocket edge attaching it to the cover. Leave the dot shape open for insertion of the scissors.
8. Place the scissors strap next to the top of the pocket. Stitch the left end of the strap onto the cover.
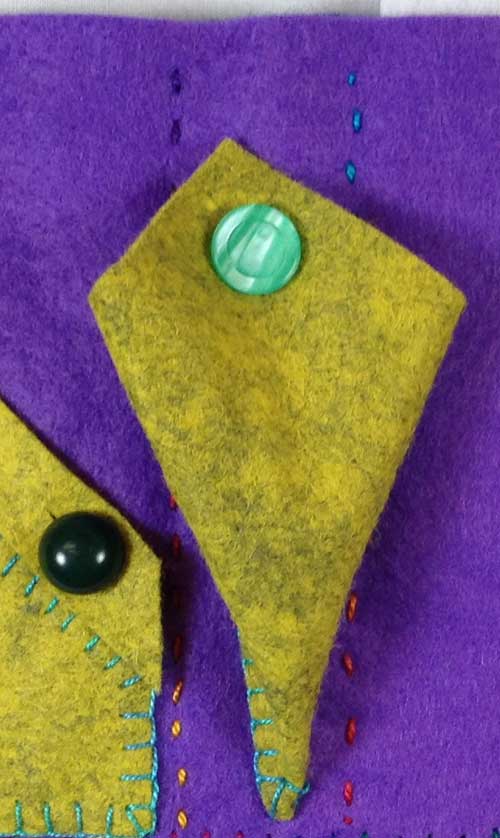
 9. Fold the thimble square from corner to corner to make a triangle. Place the open edges of the thimble triangle vertically onto the center of the cover and about 1/2” up from the bottom edge. Blanket Stitch the open edges of the thimble holder to the cover.
10. Place a 2” dot onto the right upper corner of the right side of the inside cover. Blanket Stitch into place to make the thread keeper.
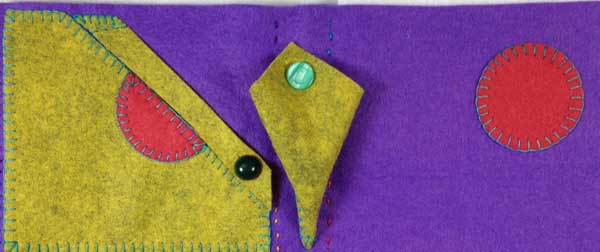 11. Add a button to the inside cover about 1” down from the center top for the thimble closure.
12. Add a button to the cover about 1/2” in from the right edge of the scissors pocket for the strap closure.
13. Cut 1/2” slits into the top of the thimble holder and into the strap end for the button hole opening.
 14. Add decorative stitching and the remaining felt dots to the outside felt cover.
 15. Place the 2 covers together with the right sides out.
16. Stitch the 2 covers together by making 2 rows of Running Stitches parallel to the center fold on either side of the thimble holder. Place the rows 5 1/2” from each end of the covers. This forms the spine of the sewing kit.
 17. Blanket Stitch the 2 covers together. Stitch the sides and base of the covers leaving the top edge open.
18. Insert Timtex interfacing between each opening at the top of the cover fabrics.
19. Blanket Stitch the remaining top edge of the covers together.
20. Insert the scissors into the pocket and strap into place. Add your thimble to the thimble holder, stick in a few needles, and you’re ready to travel!