
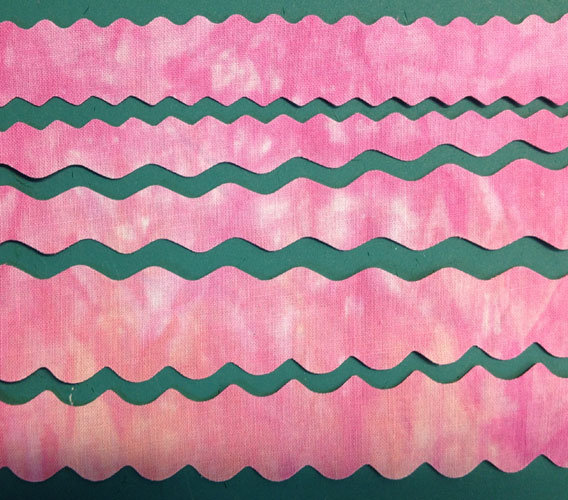
Fused fabrics cut with pinking, wave, and scallop decorative rotary cutter blades.
Do you work with decorative rotary cutter blades? They’re great for adding an embellished edge to your fused fabrics. There are a variety of rotary cutters brands on the market. And decorative rotary cutter blades like pinking, wave, and scallop fit on most 45mm rotary cutter handles.
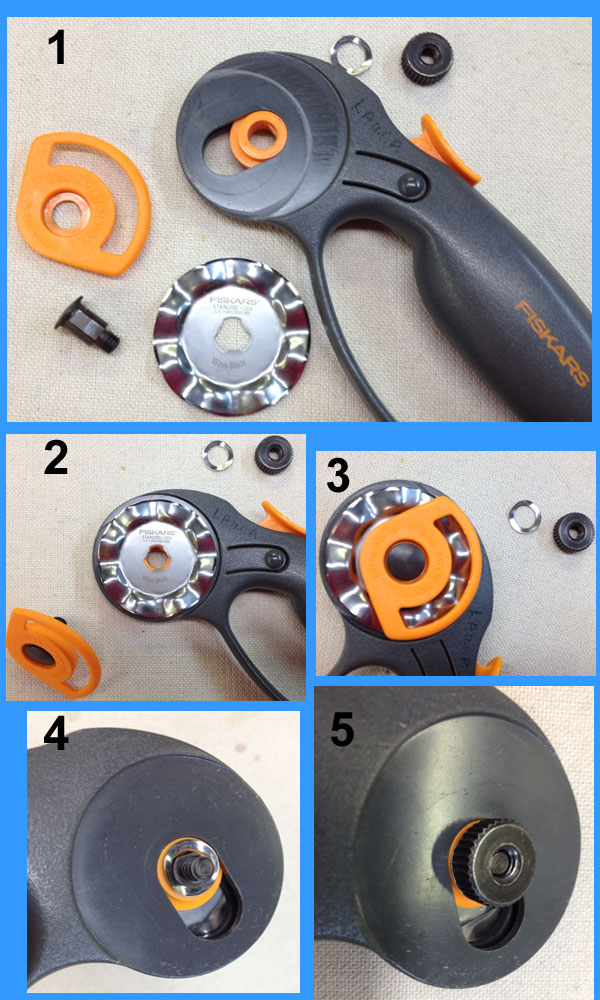
Here’s how to load a decorative blade onto the basic styles of your Fiskars and Olfa rotary cutter handles:
- If you are right handed, you will load the blade on the left side of the handle. If you are left handed, you will load the blade on the right side of the handle and use the same order of assemblage as given below.
- The black bolt in image #1 has a squared off edge as does the orange guard, edge of the hole in the handle, and tension spring. The squared off edge of the bolt must line up with the squared off edges of the guard, hole, and spring.
- Place the decorative blade onto the handle with the printed side of the blade facing out. Some blades have a scooped shape like this one. It will cut better if you always face the printed side of the blade away from the handle so you can read the printing.
- Place the bolt through the orange guard, the blade, and the handle in that order. Match up the squared off edges until the bolt seats flat.
- Place the circular tension spring onto the bolt on the other side of the handle matching the squared off edges. The spring has a cup shape. Place it so it cups up (like holding something in the palm of your hand).
- The nut has a wide opening on one side of it’s hole and a small opening on the other side. Place the nut onto the bolt with the wide opening facing the handle. Twist and tighten the nut onto the bolt. By tightening the nut you change the tension on the blade. Find the right tension so it cuts easily and doesn’t wobble.
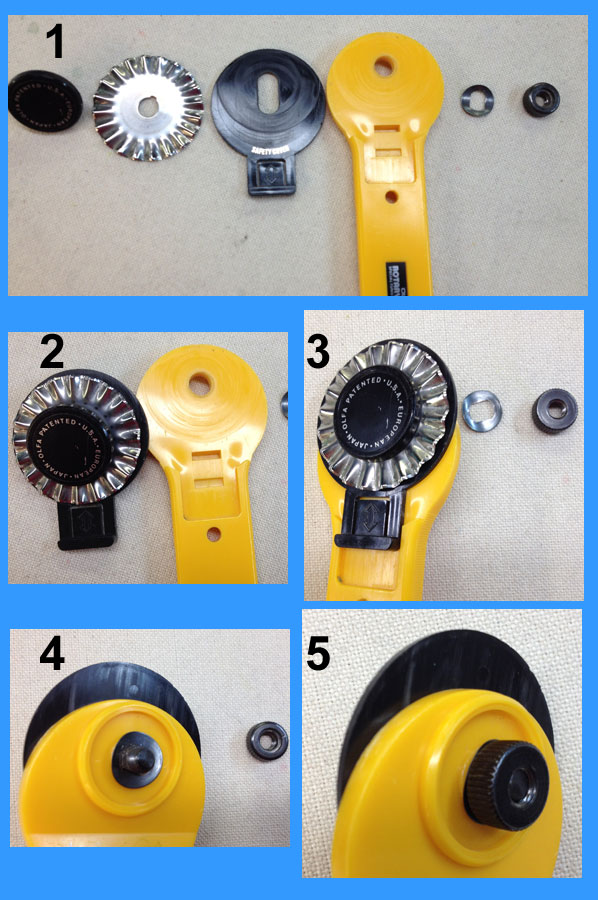
I’ve found that you can interchange Fiskars and Olfa 45mm decorative blades on most handles. Here how to load the simplest of Olfa handles:
- This type of handle can be used by both right and left handed people. The directions for loading the blade are the same.
- The bolt has a squared off edges as does the tension spring. That squared off edge of the bolt must line up with the squared off edges of the spring.
- Place the black bolt through the blade and then the black plastic safety cover. Note that the printed side of the blade is facing out away from the handle.
- Place the bolt, blade, and safety cover onto the handle by inserting the bolt into the hole in the handle. Make sure the safety cover is extended up so you don’t cut yourself with the blade.
- Place the circular tension spring onto the bolt on the other side of the handle matching the squared off edges. The spring has a cup shape. Place it so it cups up (like holding something in the palm of your hand).
- The nut has a wide opening on one side of it’s hole and a small opening on the other side. Place the nut onto the bolt with the wide opening facing the handle. Twist and tighten the nut onto the bolt By tightening the nut you change the tension on the blade. Find the right tension so it cuts easily and doesn’t wobble.