
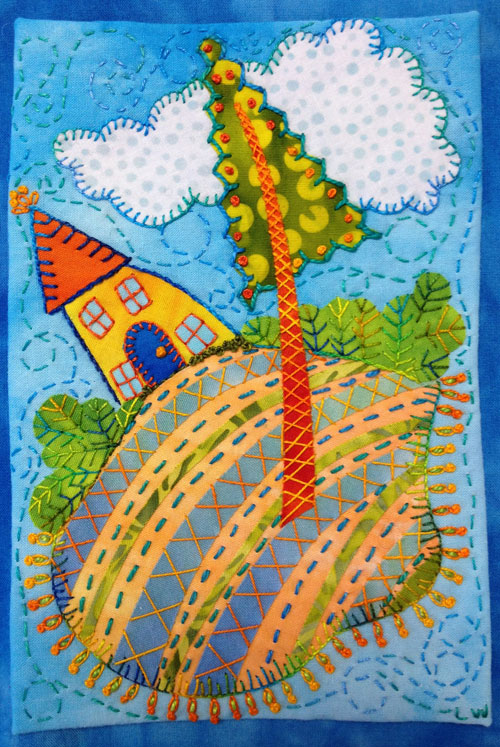
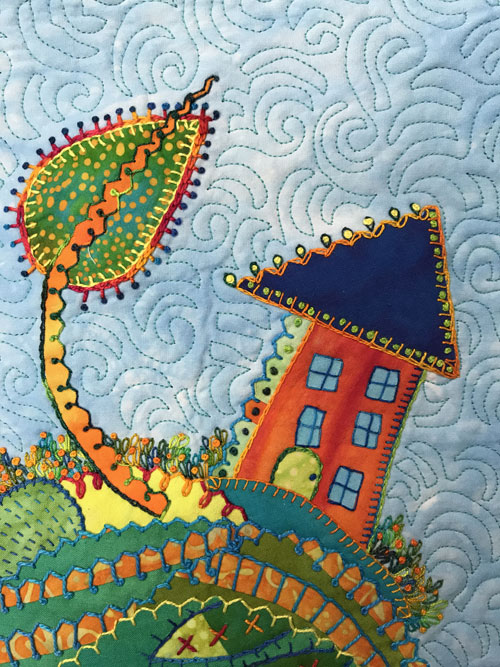
One little embroidery stitch can take your quilt from flat to fabulous! Simple stitches add line, color, texture, and those wonderful details you can’t get with fabric alone.
Here you’ll find tips on hand stitching fused art quilts, rules for working with fused fabrics, and directions for making various embroidery stitches.
Tips for Hand Stitching Your Fused Art Quilts
- Use pearl cotton thread. Why pearl cotton thread? Pearl cotton has a high twist, a slight sheen, and holds up under lots of stitching through fused fabrics. And most importantly it lifts off the surface of the fabric rather than flattening out like floss. It gives your work more texture and dimension.
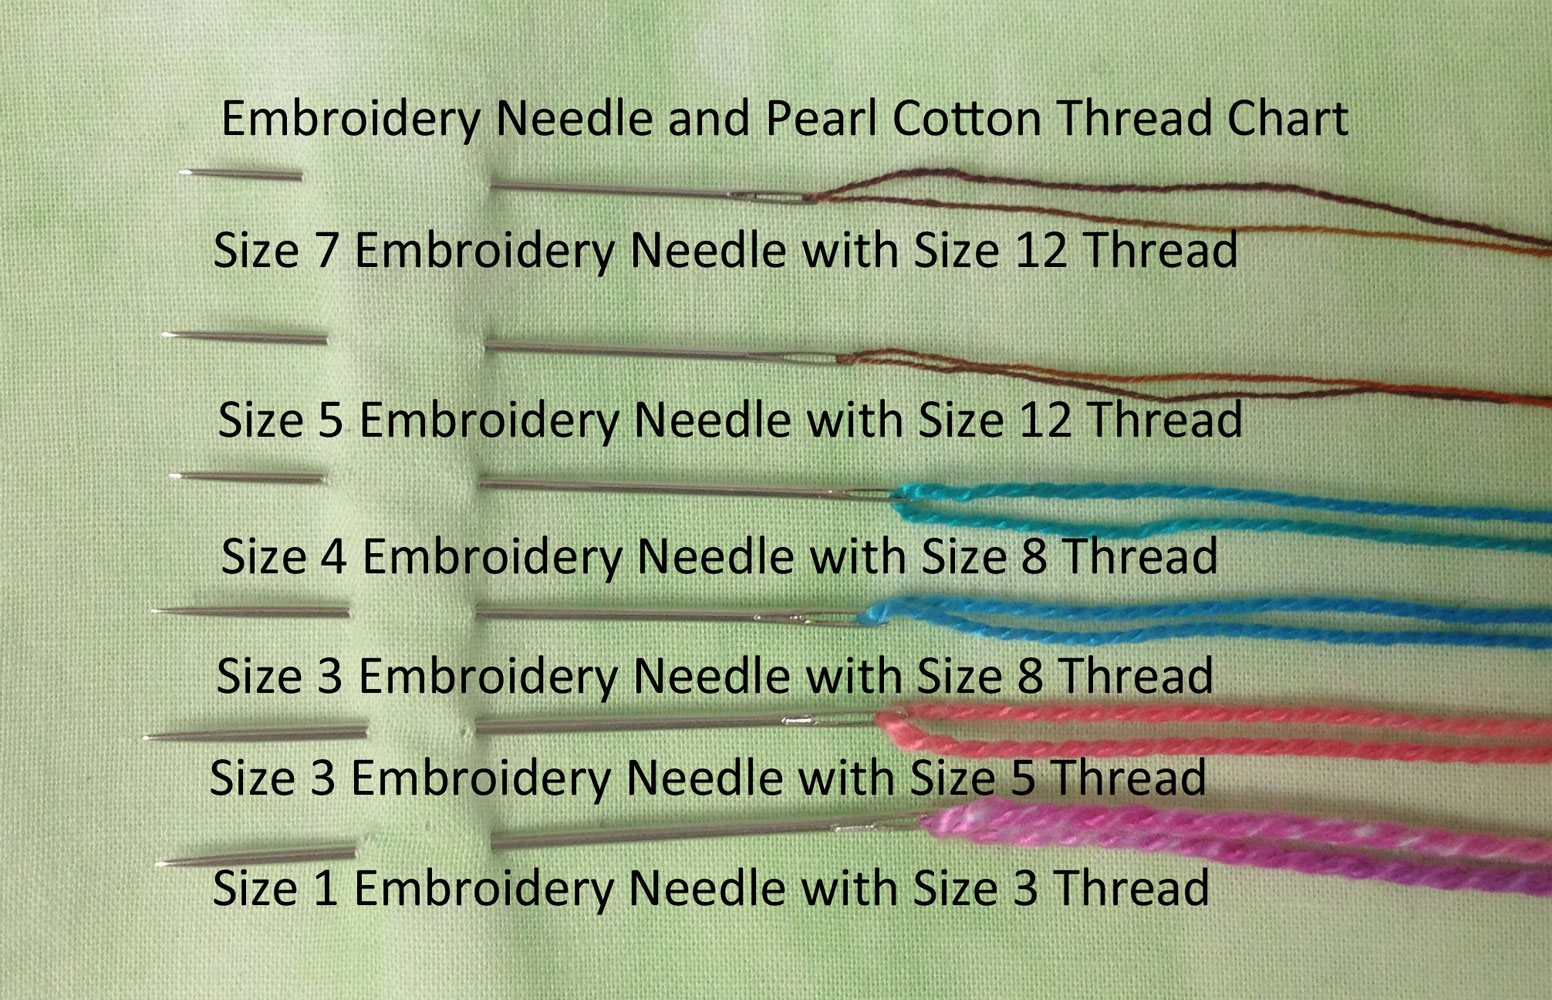
- Use the chart above to determine the appropriate size of hand embroidery needle for the size of pearl cotton thread you are using. Match the needle with the thread.
- Use the right size thread. Size 12 pearl cotton thread is the finest and easiest to stitch through several layers of fused fabrics. Size 8 is the most utilitarian thread for fused art quilts. It is bold enough to be seen but easy to stitch. Size 5 is heavier and will be a little more difficult to stitch through fused fabric. Size 3 is very heavy, difficult to hand stitch with but is perfect for couching. Read more about our hand-dyed pearl cotton threads here.
- Cut the thread about 18″ long, any longer and it tangles easily.
- Use the thread as a single.
- Knot or embed the threads in the batting.
- Do not use a hoop. A hoop will fray the fused fabrics.
- Stitch or skim just through the top and batting layers of the quilt. You are embellishing the quilt, not quilting the quilt. When all the hand work is complete, add the quilt back and machine stitch through all the layers.
- To mark a stitch line, score the fabric with the tip of the needle or a fingernail.
- Wear a thimble to protect fingers.
- Begin with the focal point of the composition and then work on other areas of the quilt. If you stitch intensely in an unimportant part of the composition, it will take a lot of stitching to draw the viewers eye back to the focal point. It is important that stitching in other areas of the quilt not become so intense that they detract from the focal point.
 The Ten Commandments of Stitching a Fused Art Quilt
1. Thou shalt not kill thy glue! We are working with fusible web, a heat activated glue. If you expose it to too much heat from an iron for too long it makes the fabric really stiff and burns the glue into the fabric. It also makes it difficult to hand stitch. When constructing your quilt top just fuse-tack the design elements for a few seconds to hold the shapes into place.
2. Thou shalt steam thy glue! Fabric with fusible web must be steam set for 10 seconds to make it permanent and to make it easier to stitch through.
3. Thou shalt use batting that is easy to stitch through! Some batts are so dense you can barely get an embroidery needle through them. Test the batting first before applying your quilt to the batt. I like Hobbs Premium 80/20, wool batting, or Fairfield’s Cotton Classic. Choose a batting that doesn’t beard with stitching.
4. Thou shalt fuse thy quilt to the non-scrim side of the batting! Fusing to the scrim side of the batt may ripple the quilt and no amount of stitching will fix it. Here’s a tutorial on determining the scrim side of your batting.
5. Thou shalt not have too many layers of fused fabric! My dainty little fingers can only stitch through 3 layers of fused fabrics. Anything more and I make sure I don’t have a lot of stitches to add in that area.
6. Thou shalt use a thimble! Its that added layer of protection that keeps your dainty little fingers happy and safe.
7. Thou shalt use a needle that is appropriate for thy thread! See the embroidery needle chart to match your thread with your needle. Then test out various brands. You’ll find hand embroidery needles here.
8. Thou shalt stitch only through the top layers of the fabric! There is no need to make every stitch go entirely through the batting and top layers. Just skim the needle and thread under the fabric to create your stitches.
9. Thou shalt have good lighting so thou shalt not go blind and stab thyself! You need to see what you’re doing.
10. Thou shalt relax and enjoy thyself! I cannot stress this enough. Relax and enjoy the process. It will change your art.
Read more Fusing Tips here.
Embroidery Stitch Directions