
 Almost all of my art quilts are creating through improvisation. Below you’ll see the evolution of a piece of my improvised artwork from start to final stitch.
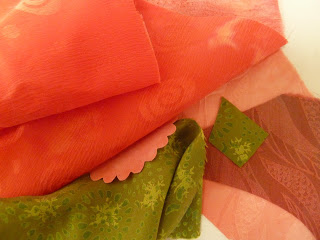
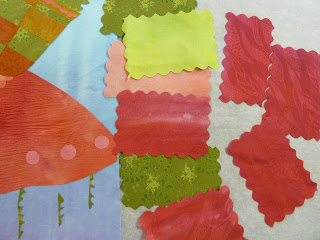
It begins with these fused silk fabric scraps. They are the “starter dough”, the puzzle parts that I must fit together. They were chosen for their shape and color and because they seduced me with their silky sheen.
Design Triggers

My first step is to sort through my pre-fused scraps of fabric. The large red shape suggests a horizon line or a division of space. The slope of that curve is most attractive! This fabric is the trigger, the beginning of the quilt design. It tells me where to begin.
Background Fabric
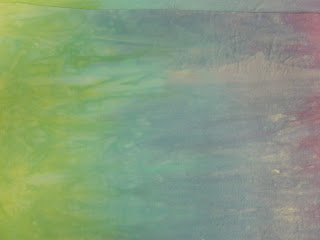
The light valued gradation of green, blue, and violet seemed the perfect foil for that seductive red silk fabric, a fabric with a lovely curve.
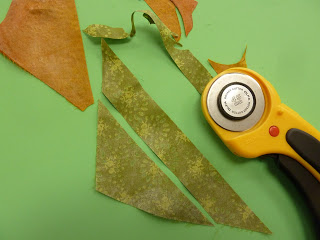
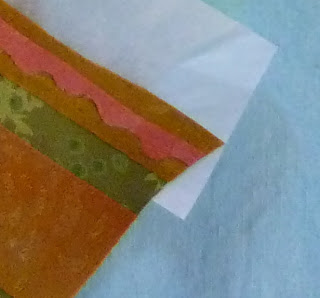
Being ever alert, I notice that some of the silk scraps chosen for the project are already cut on the bias. The light bulb turns on and I cut bias strips from these gold and green silks.
Turns out that bias cut strips are perfect for weaving because they don’t fray.( Fraying is the bane of the fuser!) The bias strips are woven into a collage and fused together on release paper. After it cools, the collage is peeled off and free-cut into this shape.
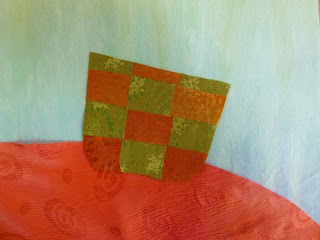
Now I know what I’m making! It’s a basket or pot that is holding something. And the red curved fabric is a table! The pot and table aren’t fused into place on the pastel background yet. Things may change and I must be free to change the position of my pot.
Free-cutting Flowers

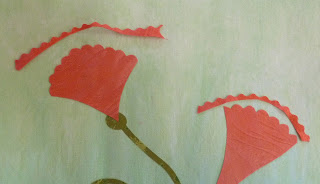
Returning to my bag o’scraps, I discover salmon colored silk shapes and some precisely cut crescent shapes. This scallop edged crescent is an extra flower cut from the Kay’s Bouquet Accuquilt die from Accuquilt.
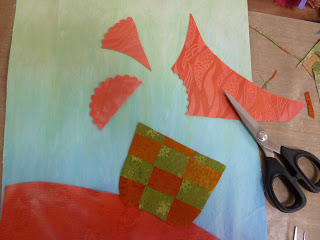
Using my favorite sharp scissors, I free-cut a trumpet shaped flower to go along with the die cut flower. Should I use the die cut silk flower and combine it with the free-cut trumpet flower?
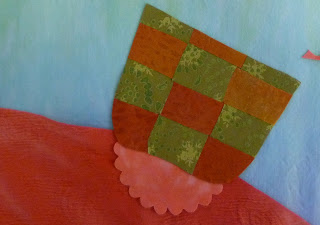
No! Lets make it a doily! Or, as we call it at my house, an antimacassar.
Arranging Elements in an “Artful Manner”
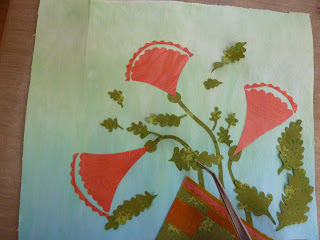
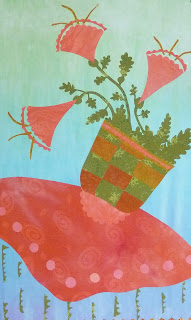
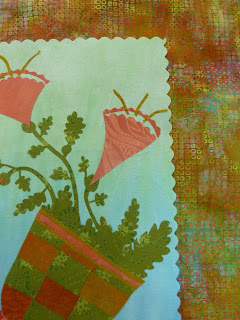
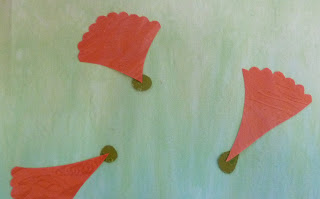 After free-cutting 3 trumpet flowers, they are arranged on the background fabric in an artful manner. (An artful manner means positioning them at different heights and at different angles for an eye-catching effect.) Note the artfully placed green dots under the flowers to make artful flower bases.
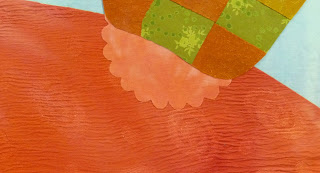 The dainty doily is slipped under the pot as it is finally positioned on the red table. The flowers, table, doily, and pot are fuse-tacked into place. (Fuse-tacking is just applying 5 seconds of heat to the fabric elements. We don’t want to kill the glue by applying too much heat for too long.)

But wait! Before fusing the pot down completely, a piece of silicon release paper or parchment paper is place just under the rim. That way stems and leaves can go under the rim of the pot when they are added.

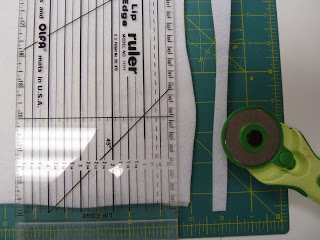
The same green fabric found in the flower pot is cut into narrow bias stems for the flowers. The fabric is placed glue-side-up when cutting on the mat. This way the glue on fabric doesn’t tack to the mat and stretch the glue on the narrow strips.
It finally occurs to me that the pot needs a rim in a color that will contrast with the stems and leaves. So a gold rim with a decorative cut pink fabric is added to the top of the pot.

Attaching a stem to the flower base dot, the stem is fused and curved down to the pot rim. The stem is sniped to size and tucked under the rim of the pot.
Inspiration and Leaves for the Stems
 Inspiration strikes! As the creation of my improvised art quilt made from fused fabric scraps continues, I make even more …. fused fabric scraps. Narrow strips of salmon/pink fabric cut with a pinking blade are placed above each trumpet flower.
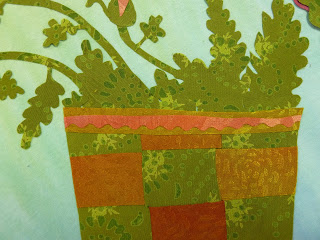
Leaves are added to the stems. Each leaf, large or small, is free-cut from that same green silk fabric found in the pot and stems.
Tiny leaves are placed on the quilt top using a pair of tweezers. Tweezers have saved many a fumbling moment when handling small pieces of fabric.
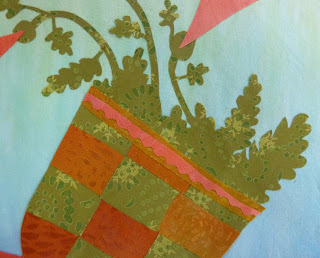 The release paper has been removed from the rim of the pot and larger leaves are tucked under the rim and fused-tacked into place. The addition of that decorative strip of salmon/pink along the rim of the pot really helps define the shape. And even though the leaves look sort of ill defined, I know hand stitchery can help them.
Adding Details
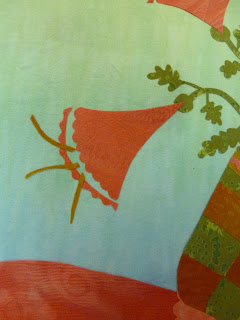
It’s time to add those fine details to the composition improvised from my fused silk fabric scraps. Details like these bias cut antlers protruding from the heads of the flowers are added. (Note sure if “antlers” is the correct botanical name.) The antlers are lightly fuse-tacked into place because the jury is still out, do I like them? If not, they are easily removed.
Again, the leaves entering the flower pot look like a mush of green. I must be patient. Hand embroidery will give them more definition.

A few irresistible dots are added to the tablecloth. There is nothing like a dot to make your day! And beneath the tablecloth narrow jagged strips are fused into place. Do you recognize them? They are the cut-aways from the edges of the leaves. Nothing goes to waste!
Borders
Now comes the moment of truth. The composition improvised from fused fabric scraps is complete but it really needs a border. Why? Because I’ve run the design right up the the edges of the background fabric. A border will frame the quilt and add formality. And much like an empty room, give the composition more room to breath.
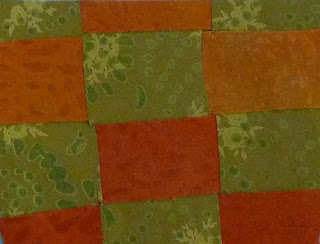
The question is what fabric should I use. Should it be strips of fabric like this? By fusing them together, they would overlap the composition about 1/4″ around each side of the quilt making a striped border.
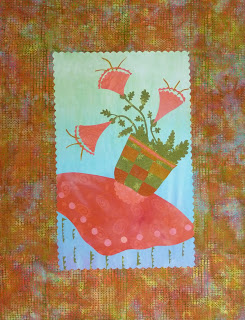
Or should I cut the composition with a decorative blade and drop it onto a piece of batik fabric like this?

The batik fabric wins out! It has many of the colors in the composition but does not overpower the piece like the strip-fused border above. It frames the piece, making it the star.
Adding the Batting
 The quilt composition improvised from my fused fabric scraps is complete and it’s time for the fun part, adding fine details with hand stitchery! But first we have to make the inner stuff, the batting and Timtex that give you something to stitch into and that will hold the quilt into shape. We’ll do this with a Wrapped Binding. (See Directions here: The Wrapped Binding )
Now that the quilt top is steamed to the batting the fun part begins! Hand stitchery!
See our Tutorials on hand stitching your fused art quilts.