

They say the nut doesn’t fall far from the tree.
What does this have to do with our Frieda’s Nut House design?
Nothing.
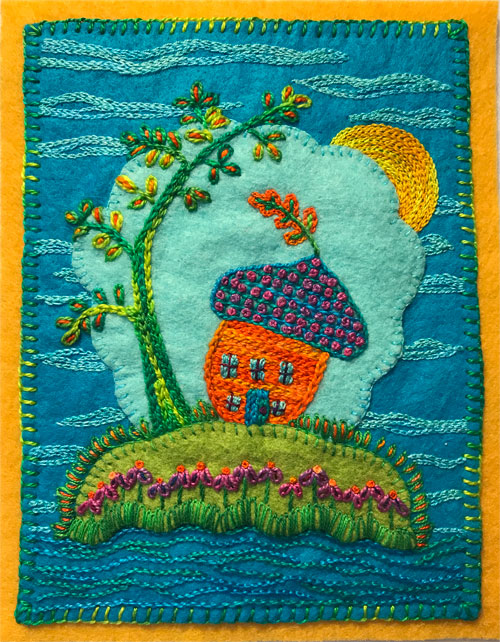
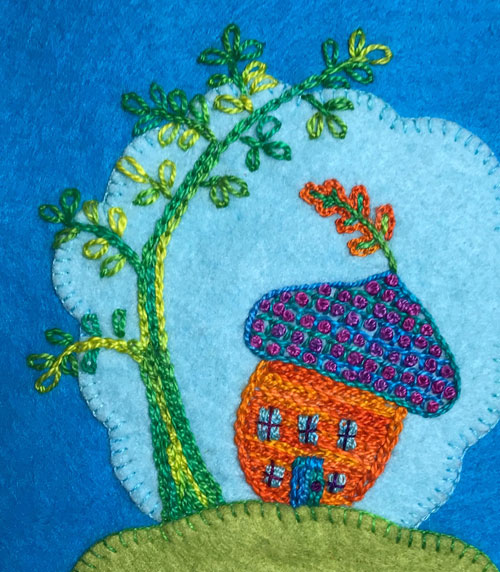
But we are about to add a tree next to the nut house. There is no pattern for the tree. It is stitched free-form as are the windows, a door, and little leaf sprouting from the tip of the nut house.
Note: If you’re just joining us, see a list of materials on Frieda’s Nut House Stitch-Along Tutorial page and complete Steps 1 – 7.
Step #8

- Stitch Stem Stitches vertically and next to each other on the nut house to make a door measuring about 1/ 2” high. Use a size 8 pearl cotton thread (like Aquamarine) and a size 3 embroidery needle.
- Stitch a French knot on the door to make the doorknob. Use a size 12 thread (like Violets) and a size 5 or 7 embroidery needle.
- Stitch Straight Stitches vertically and next to each other on the house to make 5 windows. Use a size 12 thread (like Ocean).
- Stitch Straight Stitches to make a plus sign shape on the windows to create window panes. Use a size 12 thread (like Violets).
Step #9
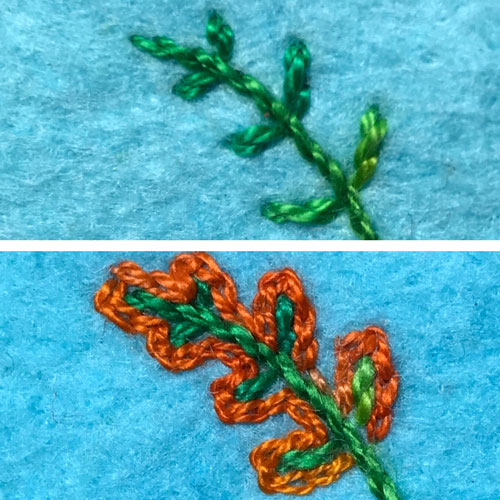
- Stitch Stem Stitches vertically from the tip of the nut house roof to make the stem of a leaf Use a size 12 thread (like Emerald Isle).
- Using that same color of thread, stitch Stem Stitches from the stem out at an angle to create 6 veins for the leaf.
- Stitch Chain Stitches around the stem and veins to make the leaf shape. Use a size 12 pearl cotton thread (like Oranges).
Step #10
- Stitch Chain Stitches in an arc from on the left of the nut house from the ground up to the top of the sky to make the tree trunk. Use a size 8 pearl cotton thread (like Lettuce).
- Using that same thread, stitch a line of Stem Stitches measuring about 1/4″ long from the tip of the Chain Stitches to create a branch.
- Stitch Lazy Daisy Stitches off the Stem Stitches to create leaves.
- Add 4 more sets of branches and leaves down the length of the tree top.
- Stitch Chain Stitches from the last tree top branch down to the ground next to the first row of Chain Stitches.
- Continue to add branches and leaves to the tree trunk. Make thicker, lower branches with Chain Stitches.
- Add more rows of Chain Stitches to make the base of the tree trunk wider.
Step # 11
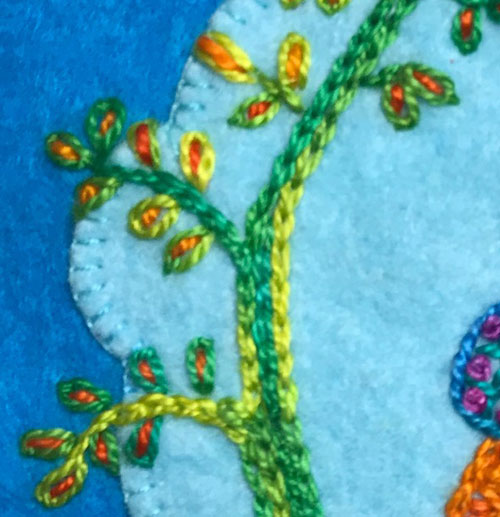
- Stitch Straight Stitches inside each Lazy Daisy leaf. Use a size 8 pearl cotton thread (like Oranges).