

Ready to start the Queen Poppy Project?
Great!
You’ll find a list of what you need on the Queen Poppy Stitch-Along page. As you gather your materials, I suggest using cotton fabrics to make your quilt top. Be sure to wash your fabrics before starting Step #2.
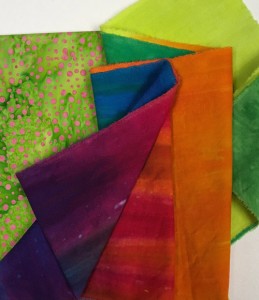
Here you see a green batik for the background and my hand dyed rainbow fabric from the Stitch Kit which has all the colors needed to make the poppy itself.
Step #2 Fusing the Fabric
- If you’ve purchased a Queen Poppy Stitch Kit, please skip to Step #3.
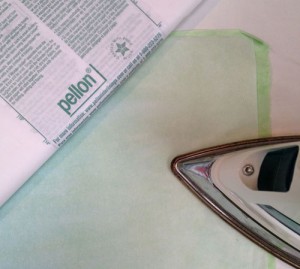
- Cut the fusible web slightly smaller than the fabric. (See suggested fusible webs in the materials list.)
- Place the fabric on the ironing surface then put the rough side or glue side of the paper on top. (If using Misty Fuse, place the web on the fabric and cover the web with parchment paper.)
- Transfer the fusible web to the fabric using a hot (cotton setting), dry iron.
- Glide the iron across the paper from edge to edge for about 5 seconds in each spot. Go to the edge and beyond!
Step #3 Silicone Release Paper
- Let the fabric and web cool 5 – 20 minutes before removing the paper. Do not remove the paper from the background fabric.
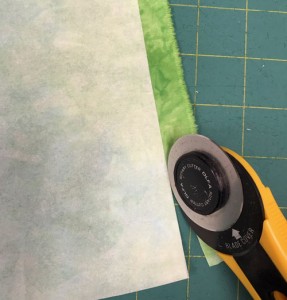
- Before removing the paper from the other fabrics, separate the fabric from the paper at one corner. Then trim any non-fused fabric off by following the paper’s edge. Peel the paper off without ripping it. Save the paper.
- The paper you’ve just removed is called silicone release paper. It has a silicone coating and will be used to transfer pattern shapes to the fused fabrics.
- Parchment (or baking) paper is similar to release paper and can be used in place of release paper.
- Either side of silicone release paper or most parchment papers are usable for fusing. Please note, however, that on some versions of fusible web only the “shiny” side of the paper is usable as release paper.