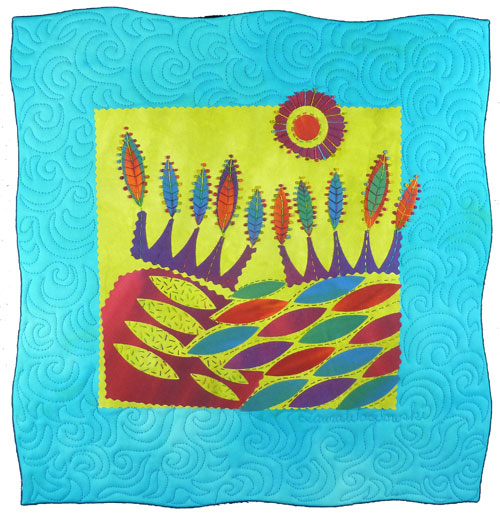
Today’s discovery in my studio is a Go! Baby Fabric Cutter from AccuQuilt. And it reminded me of how much I enjoyed making this little quilt, Quiet Morning #2.
Quiet Morning #2 is living with a collector somewhere in the world today. But in the next few days, I’ll show you how to improvise a quilt design like this with die-cut shapes.

True, I usually free cut fabric shapes when making an improvised quilt. But with a die cutter, it is easy to crank out multiples of perfectly cut shapes.
This die, #55327, has 2 different dot sizes and 2 different petal sizes. Also, a really neat negative shape appears after cutting the fabric. Negative shapes have a lot of potential.
First Steps in Using a Die Cutter to Make an Improvised Quilt

- Select a die with the shapes you want to use. Dies made for applique like the Accuquilt Daisy Die #55327 I’m using are my favorite.
- Pre-fuse the fabrics for your design. (See Fusing Tips.) I’m using 1/4 of Rainbow Rich fabric that has all the colors I need for this project.
- After the fabric cools, remove the paper that comes with the fusible web.
- Cut 4 rectangles measuring the same size as the die using a decorative rotary cutter blade like a pinking blade or use pinking shears. Why, you ask? Because it looks good and you’ll thank me later.
- Place the die on the cutter bed with the foam side up.
- Stack the fabric squares on the die with the glue sides up. This is important: do not stack the fabric with the glue sides together or you will never get them separated. (Ask me how I know!)
- Put the protective mat on the fabric and crank the die, fabric, and mat through the roller.
- Separate the shapes and think about how you might use them in an improvised design. I’ll show what I did with mine in a few days.

