

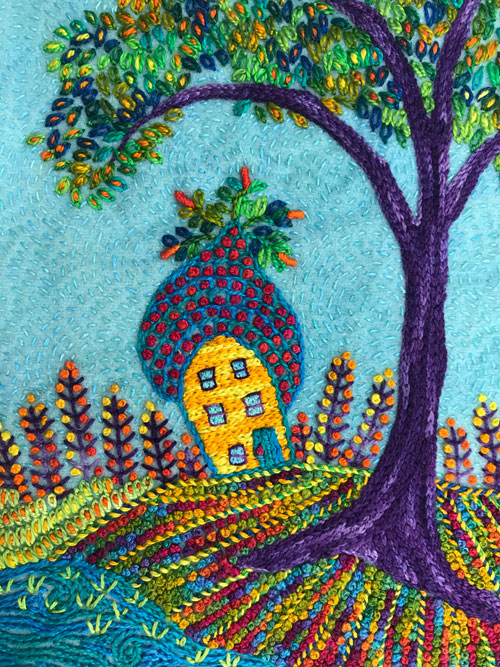
Ladies and gentlemen raise your needles! It is time to start our free tutorial, Home in the Country.
This free-form hand embroidery is made on a single piece of wool fabric and measures about 8″ x 10″ when complete. You can join the stitch-along at any time.
In this step we are transferring the shapes for the house, hills, tree, and sun to the fabric using a pattern you can download and print.
Please note that directions are added to the Home in the Country Stitch-Along page after they are first posted here on the Artfabrik blog.
Gather Your Tools and Supplies
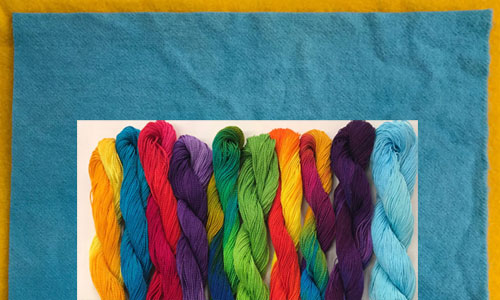
The wool fabric I’m using in Home in the Country is a dream to stitch! It is a hand-dyed wool from my favorite wool dyer Tracy Trevethan. Using Tracy’s wool, I’ve assemble a Stitch Kit for you along with all the threads you’ll need to make the design. Or you can assemble your own stitch kit. You can see a complete list of the items you’ll need here including the link to the pattern.
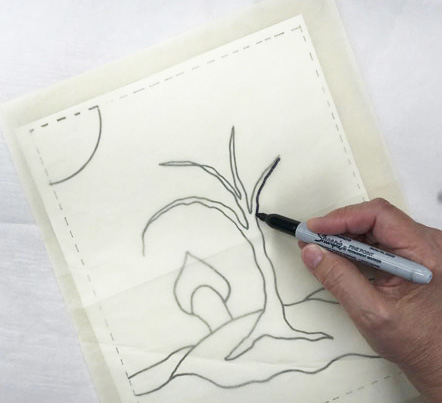
Step #2- Transferring the Pattern Shapes
- Download and print out this Word document of the Home in the Country pattern. Or print out this PDF of the Home in the Country pattern.
- Complete the directions below. Or follow the directions on the printed Home in the Country pattern to transfer the shapes to the fabric.
- Place tracing paper on the drawing and trace it with a black marker. If you like, copy the dashed lines around the pattern too. It’s not necessary but they can help you line up the pattern on the fabric.
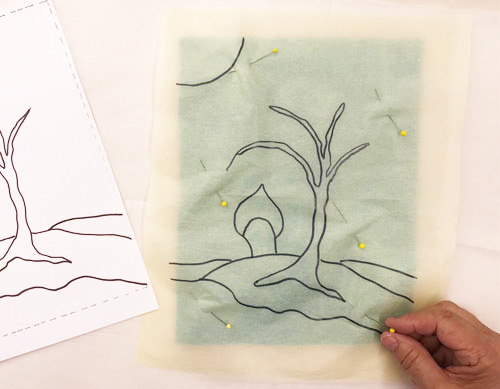
- Place the fabric vertically so it is 8″ across by 10″ high.
- Position the tracing paper on the wool fabric.
- Pin the tracing paper into place.
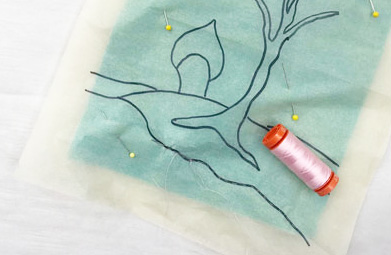
- Follow the black marker lines on the tracing and stitch the outline of the shapes in the design using Running Stitches. (Do not stitch the dashed lines around the edge if you have traced them.)
- Stitch with a sewing thread (40 or 50 weight) or a size 12 pearl cotton in a color contrasting to the background fabric and a sewing needle or size 5 embroidery needle.
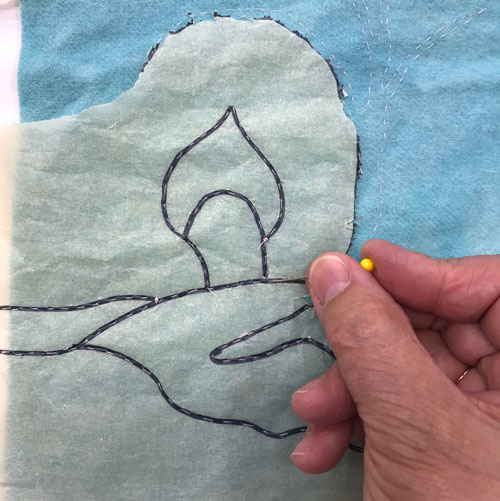
- After stitching the outline, remove the paper using the tip of a pin to score the paper next to the stitches.
- Gently rip away the paper.
- The Running Stitches define the edges of the design and will be removed after stitching the shapes with permanent stitches.