Queen Poppy: Binding

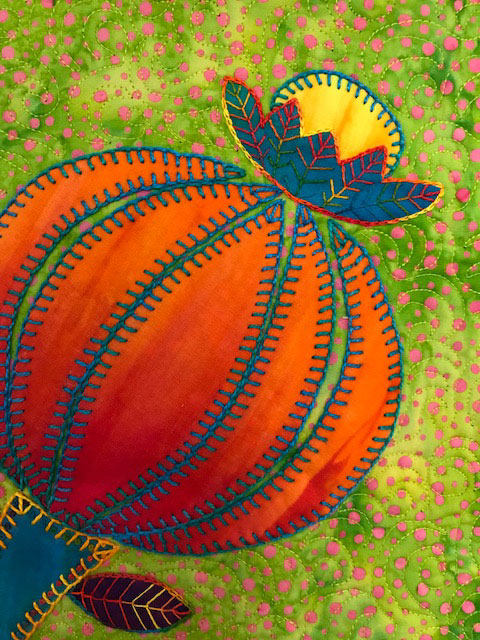
Just a few more steps and your Queen Poppy quilt is complete.

Thank you so much for joining me in making this little fused art quilt. I hope you’ve enjoyed it. And if you want to share a photo of your Queen Poppy with me, please email me at laura at artfabrik.com.

(If you need to catch up, please visit the Queen Poppy Stitch Along page to create your quilt.)

Step #10

  • Machine quilt the quilt using a titanium or chrome coated embroidery needle and free-motion stitching. (Please note that this step is optional. It is not necessary to machine quilt the piece.)
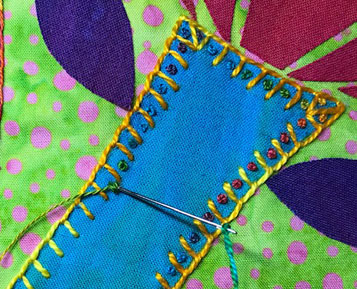
  • To add free-motion stitching, drop the feed dogs on the machine and guide the needle around all the organic shapes in the design while moving the quilt.
  • Add a hanging sleeve across the top part of the quilt if desired.
  • You did it! Please send me a photo of your artwork. I’d love to see it. Send to: laura at artfabrik.com

Queen Poppy: Finishing Embroidery

We are close to the finish line! The final steps for hand embroidery are … at hand.

You’ll notice that the turquoise thread outlining the poppy bulb is the complementary color of the orange fabric. Turquoise makes orange sing.

The thread color also repeats the turquoise found in the stem, crown, and other threads used in the design. Repetition of color holds the viewer’s attention and draws their eye around the piece. Give it a try!

(If you need to catch up, please visit the Queen Poppy Stitch Along page to create your quilt top and begin the embroidery.)

Step #9

  • Stitch Blanket Stitches around each edge of the shapes that make up the poppy bulb. Use a size 8 pearl cotton thread (like Aquamarine) and a size 3 hand embroidery needle.

  • Stitch Fern Stitches from each tip of the bud crown down to the base of the crown. Use a size 12 pearl cotton thread (like Southwest Rainbow) and a size 5 hand embroidery needle.

  • Stitch a Chain Stitch around the edges of the bud crown. Stitch on the background fabric and right next to the edge of the crown to outline the shape. Use a size 12 pearl cotton thread (like Sunrise).

Queen Poppy: Stem and Leaflet Embroidery

As you may have guessed, I like bright colors. And I especially like thread in bright variegated colors. 

Variegated thread adds spark to your hand embroidery. The color shifts lend movement and interest to the stitchery catching the eye.

Some of the colorways I use have subtle varigated color shifts (like Butter) and others have abrupt changes in hue (like Southwest Rainbow). As long as the colorway is not too same ol’ same ol’ I’m happy. It takes so little to make me happy!

(If you need to catch up, please visit the Queen Poppy Stitch Along page to create your quilt top and begin the embroidery.)

Step #8

  • Stitch a Blanket Stitch around the edges of the poppy stem. Use a size 8 pearl cotton thread (like Butter) and a size 3 embroidery needle.
  • Stitch French Knots inside each tine or gap in the Blanket Stitch. Use a size 12 pearl cotton thread (like Southwest Rainbow) and a size 5 embroidery needle.

  • Stitch the Fern Stitch from the tip to the base of the 2 leaflets off the stem. Stitch down the center and span the width of the leaflets. Use a size 12 pearl cotton thread (like Sunrise).
  • Stitch a Chain Stitch around each leaftlet. Stitch on the background fabric and right next to the edge of the leaflet to outline the shape. Use a size 12 pearl cotton thread (like Southwest Rainbow).