
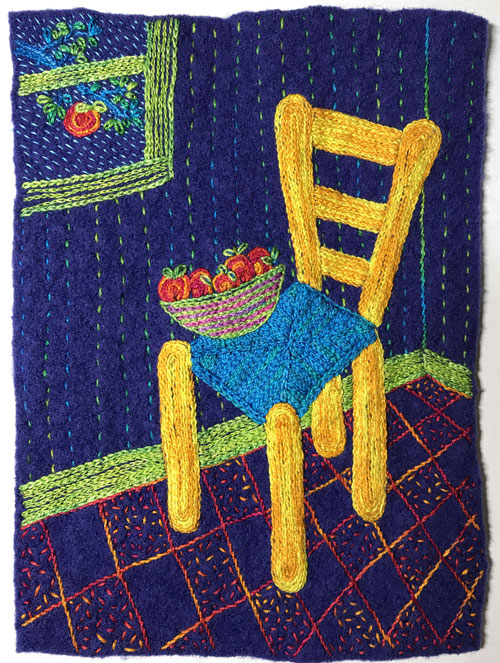
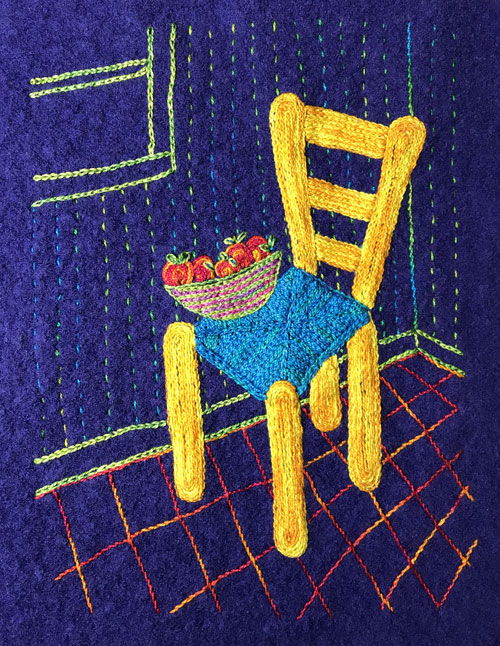
Yellow Chair by Laura Wasilowski
In this stitch along you are given a little structure (a pattern for the chair) and then released into the wilds of free-form embroidery. The Yellow Chair is hand embroidered on wool using techniques from my new book Joyful Stitching: Transform Fabric with Improvisational Embroidery.
The written and illustrated directions for Yellow Chair, are also found in Free-Form Hand Embroidery on Wool along with 4 other projects stitched on wool.
Materials Needed for the Yellow Chair Stitch-Along:
- Click here to purchase a kit of the wool and threads needed. Or use the following items you already have in your stash.
- 7” x 9” purple wool
- Size 8 threads in these colorways: Butter, Aquamarine, Really Red, Peas in a Pod, Prinky Phlox, Lettuce or similar colors
- Size 12 thread in the Forget Me Nots colorway or similar color
- Printed pattern for the Yellow Chair. Click here for a PDF of the pattern to download and print.
- Straight pins
- Black fine point marker
- Tracing paper
- Sizes 3 or 4 hand embroidery needles
Directions

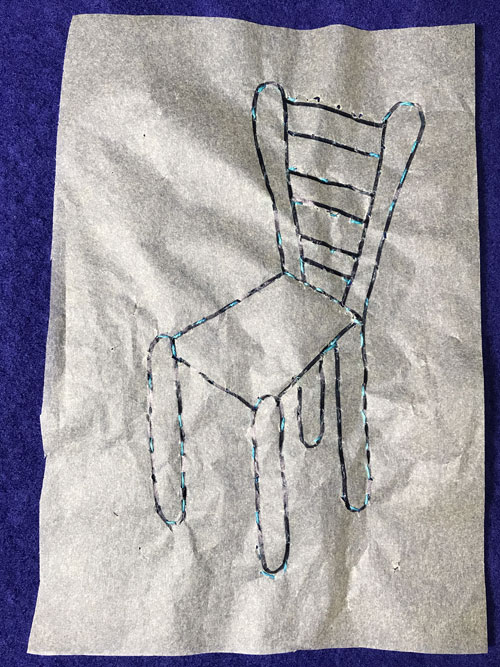
1. Download and print out the Pattern PDF of the Chair.
2. Trace the chair pattern onto tracing paper using a black marker.
3. Pin the tracing to the wool with straight pins.
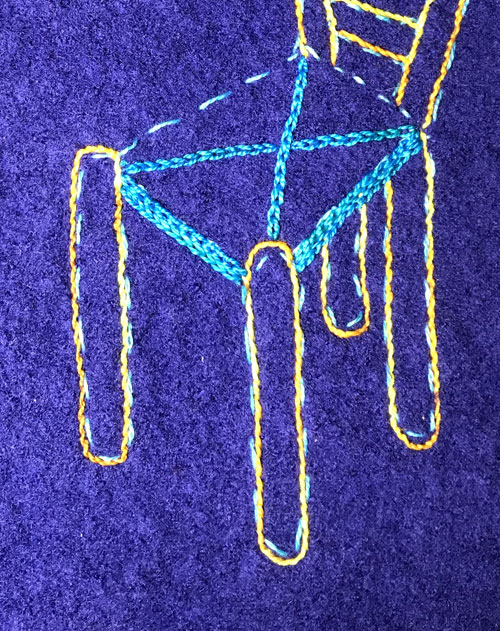
4. Stitch the outline of the design onto the wool using the light colored size 12 pearl cotton thread. Follow the back marker lines on the tracing and use Running Stitches.
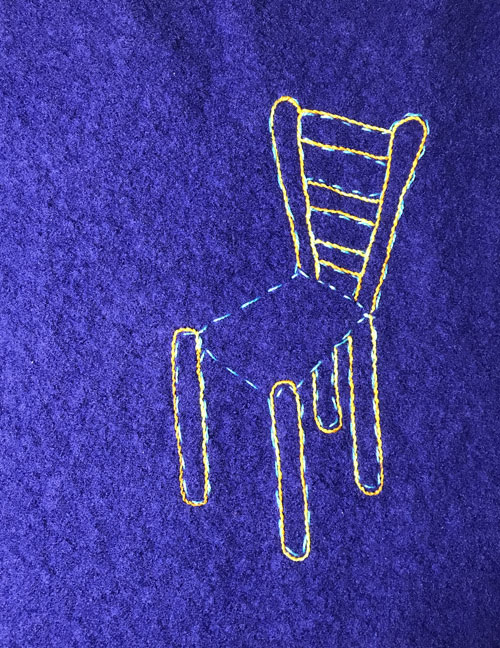 5. Stitch Stem Stitches around the outline of the chair legs and back.
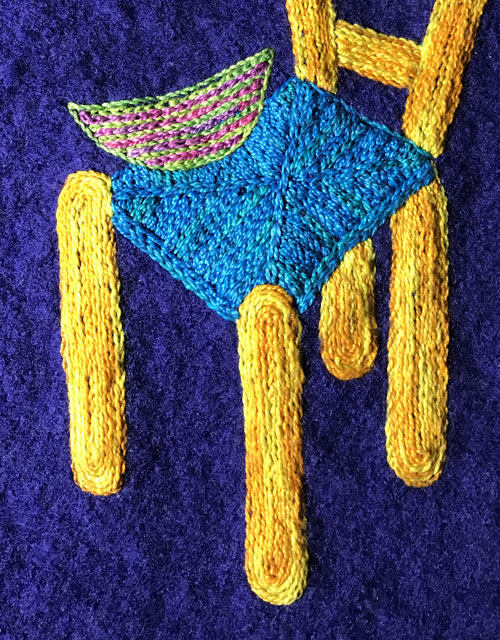
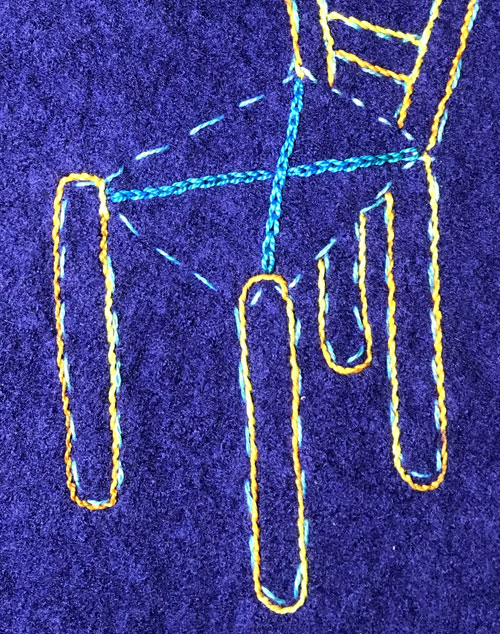 6. Stitch Chain Stitches across the chair seat to form an X.
 7. Stitch 2 rows of Chain Stitches next to each other along the outline of the bottom edge and the right side of the chair seat.
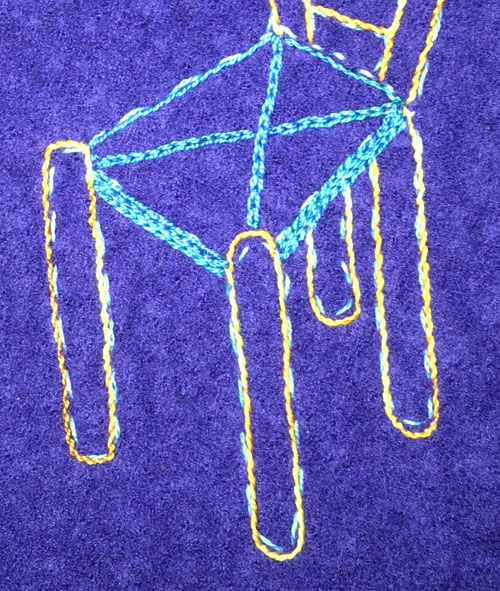 8. Stitch Stem Stitches along the outline of the left side and top edge of the chair seat.
9. Remove the Running Stitches that marked the outline of the chair shape.
 10. Stitch close rows of Stem Stitches inside the outline of the chair legs and back.
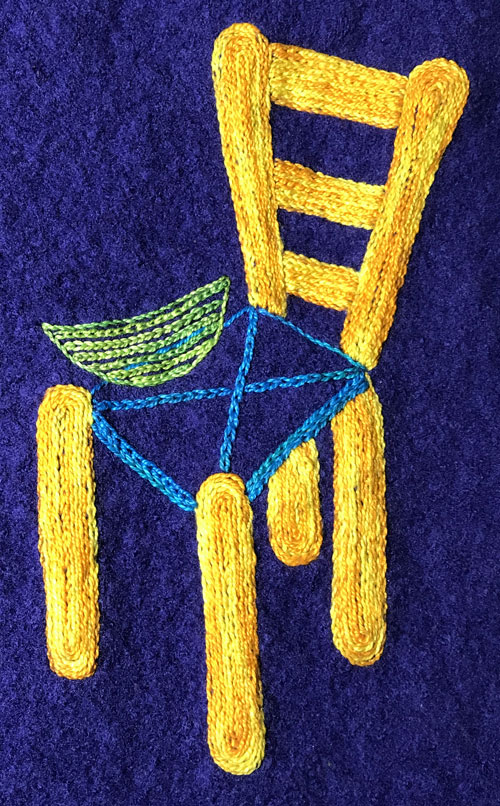 11. Stitch Stem Stitches to form a bowl shape sitting on the chair.
12. Stitch Chain Stitches across the bowl to form wide stripes.
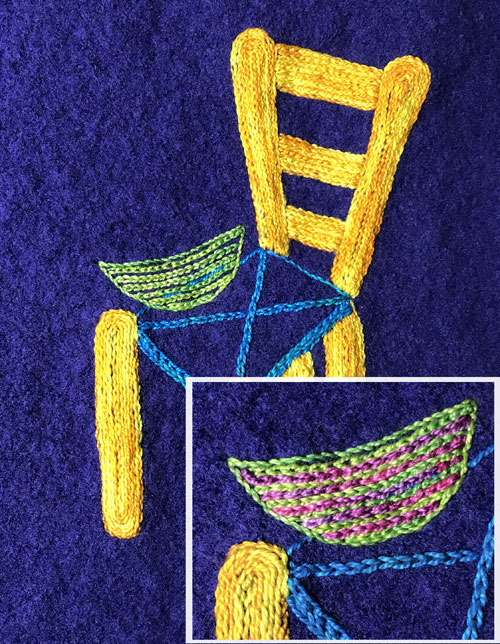 13. Stitch Chain Stitches across the bowl to fill in the stripes in the bowl.
 14. Stitch close rows of Chain Stitches across the chair seat. Stitch from the edges of each quadrant to the center of the X to fill in the seat.
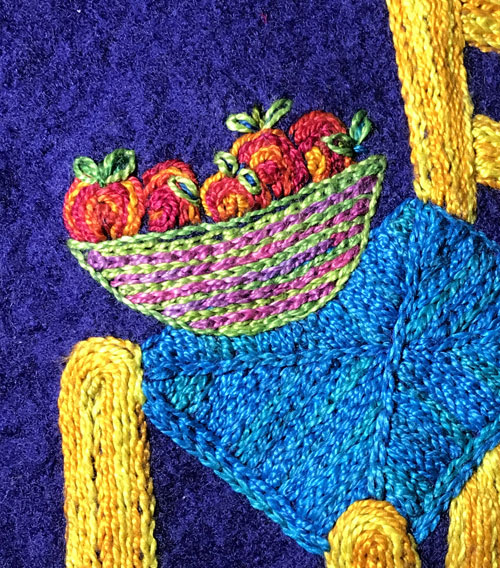 15. Using Stem Stitches, stitch 5 – 6 small circles inside the bowl to form apples. Fill in the circles with close rows of Stem Stitches.
16. Stitch Lazy Daisy Stitches on the apples to form leaves. Fill in the Lazy Daisy Stitches with a Straight Stitch if desired.
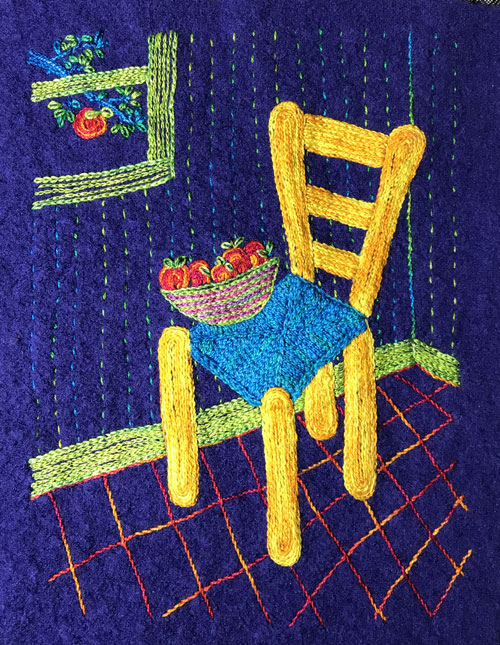
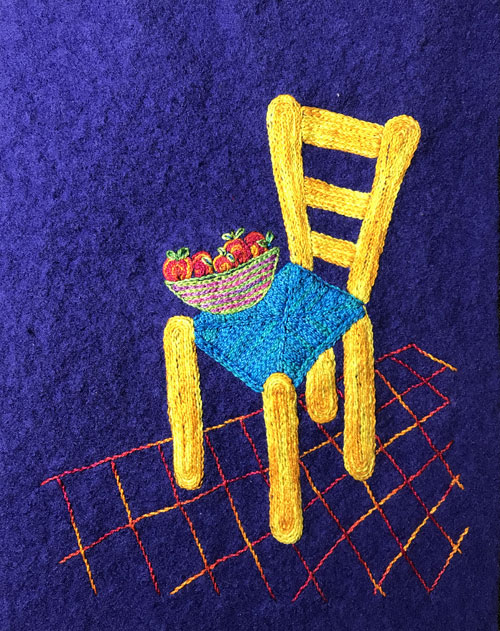 17. Stitch Stem Stitches at an angle to the chair to form tiles on the floor. Make the corner of the room (where the floor tiles end) about 1″ to the right and 2″ up from the base of the right chair leg.
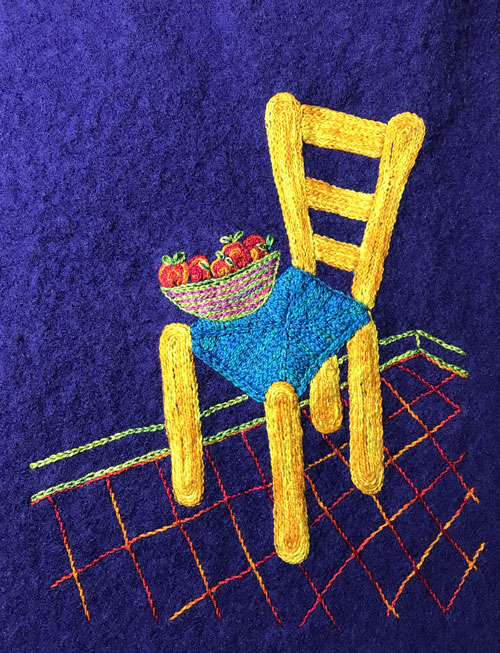 18. Stitch Chain Stitches across the top of the tiles to form the bottom of the baseboard on the wall.
19. Stitch a vertical line of Chain Stitches to make the corner of the room.
20. Stitch a second row of Chain Stitches to make the top of the baseboard on the wall.
 21. Stitch 2 sets of parallel rows of Chain Stitches at an angle parallel to the baseboard. Place them in the top left of the design to form the horizontal window casings. Stitch parallel rows of Chain Stitches vertically to form the right window casing.
22. Stitch Stem Stitches vertically from the baseboard corner up to form the corner of the room.
23. Stitch Running Stitches in vertical stripes down the wall to the baseboards to form the wallpaper.
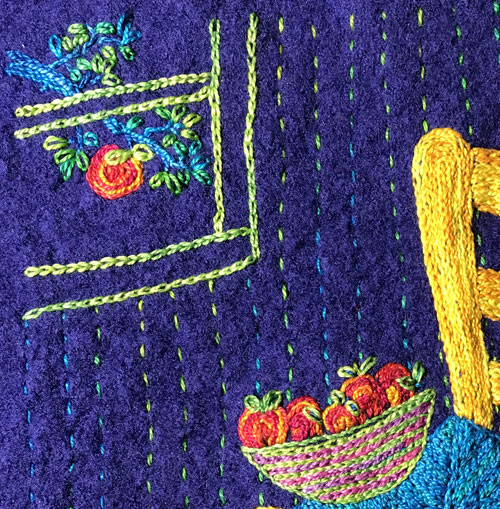 24. Stitch Stem Stitches in rows to make a branch in the window.
25. Stitch Stem Stitches in a circular shape to form an apple hanging from the branch. Stitch Lazy Daisy Stitches on the branch to form leaves.
 26. Stitch Chain Stitches to fill in the window casings and baseboard.
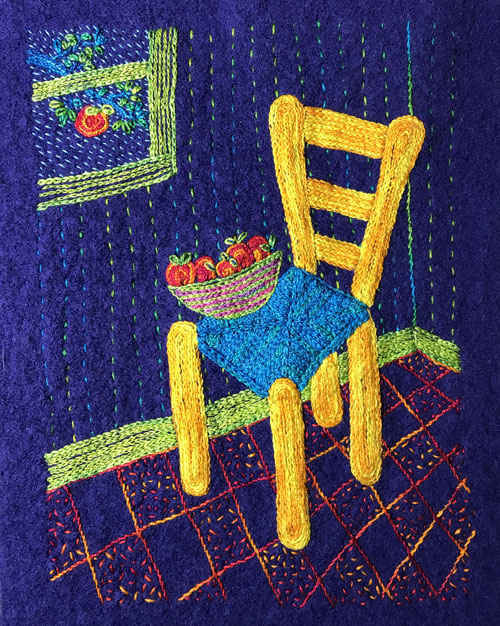 27. Use the Size 12 thread and a Size 5 or 7 embroidery needle. Stitch Running Stitches at an angle inside the window to make rain. Stitch Scattered Seed Stitches inside the tiles on the floor.

Yellow Chair by Laura Wasilowski
28. Trim the outside edges of the design.