
The Bayeux Stitch is used extensively on the famous Bayeux Tapestry created in 1077 depicting the story of William the Conqueror’s rise to power in 1066. The stitch is useful in covering large areas of fabric with embroidery to create solid shapes. Materials used to create this version of the Bayeux Stitch vary a great deal from the original embroidery of the 11th century. The background fabric is a thick boiled wool (not linen), the thread is pearl cotton size 8 (not wool), and no hoop is used to hold the fabric taut. Here’s how to make the Bayeux Stitch.

1. Stitch Stem Stitches to outline the shape to be filled with the Bayeux Stitch.
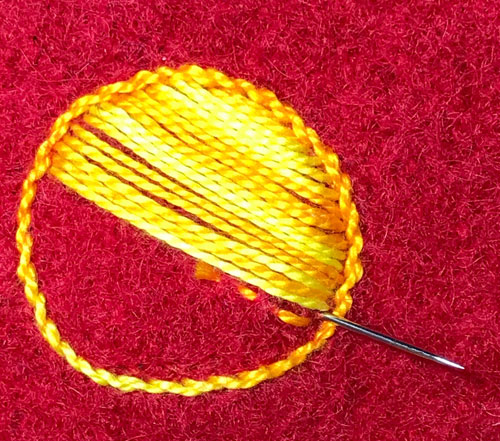
2. Bring the needle up next to the Stem Stitches on one side of the shape. Insert the needle on the other side of the shape next to the Stem Stitches and draw the needle and thread through the fabric to make the first long stitch. (In this case, I began in the center of the shape. Note that the running stitches that anchor the thread will be covered with the top threads.) Do not pull the thread too hard or the shape will curl.
3. Bring the needle up again as close as possible to the place where it went down, not across the back of the fabric. (This saves on thread.) Insert the needle at the other side of the shape and draw the thread through the fabric. Keep the stitches so close that no fabric shows between them. Continue across the fabric to fill in the shape.
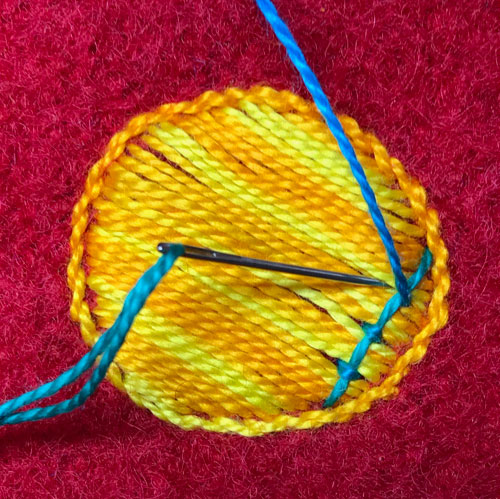
4. When the shape is filled in with long stitches, bring a second color of thread up on the side of the shape next to the Stem Stitches. Lay the thread across the background stitches, insert the needle next to the Stem Stitches, and draw the thread through the fabric. Using that same thread, Couch or hold down the long stitch with small stab stitches at regular intervals.
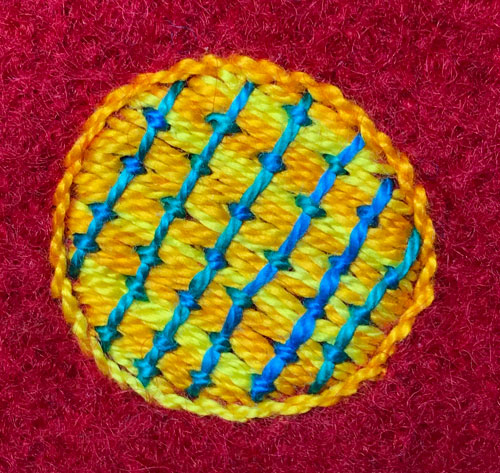
5. Continue to add lines of thread across the background threads. Alternate the stab stitches used to couch the cross threads to create a brick pattern.