

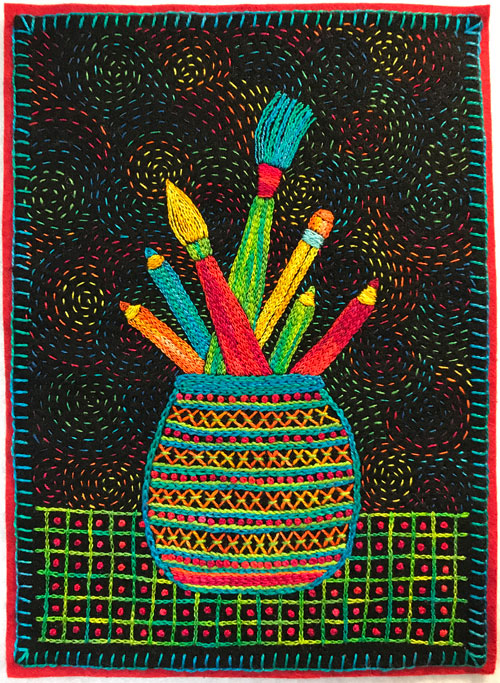
In choosing the thread colors for this project, I relied on 2 basic principles of design: contrast and repetition. The high contrast between the black background fabric and bright thread colors creates well defined shapes. These hard edges give a graphic, woodcut, or cartoon-like look.
Thread colors also fulfill another basic principle of design, repetition. The eye naturally looks for multiple instances of a repeating color like the color red in this piece. By repeating thread colors, the viewer is engaged and spends more time with the work. Repetition also gives a sense of balance and completion to artwork.
These basic principles of design, contrast and repetition, are universal to all art mediums. Look for ways to use contrast and repetition in your own art work.
Please Note: You’ll find steps on how to make the design added to the Tools of the Trade Stitch Along page as we go. It’s all free and you can join at anytime.
Step #10
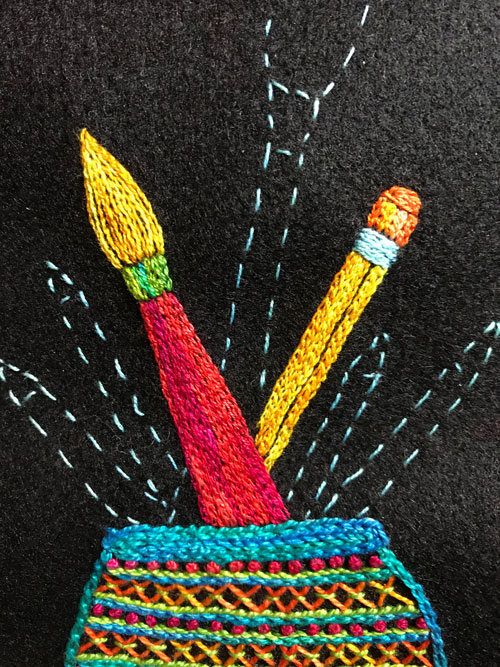
- Stitch Chain Stitches vertically to outline the shaft of the pencil following the Running Stitches. Use a size 12 thread (like Butter) and a size 5 or 7 embroidery needle.
- Stitch rows of Chain Stitches vertically to fill in the pencil shaft. Leave a small gap between 2 rows of the the Chain Stitches to make an edge.
- Stitch Stem Stitches horizontally and in rows across the top of the pencil to make the ferrule. Use a size 12 thread (like Forget Me Nots).
- Stitch Chain Stitches vertically to make the bottom part of the eraser. Use a size 12 thread (like Oranges).
- Stitch Stem Stitches to outline the tip of the eraser using that same thread color. Fill in the eraser tip with horizontal rows of Stem Stitches.
- Remove the Running Stitches that outline the pencil shape.
Step #11
- Stitch Chain Stitches vertically to outline the shaft of the first colored pencil. Use a size 12 thread (like Oranges).
- Stitch rows of Chain Stitches vertically to fill in the pencil shaft.
- Stitch Stem Stitches horizontally and in tapering rows across the top of the pencil shaft to make the wood. Use a size 12 thread (like Butter).
- Stitch Fly Stitches on the tip of the pencil using the same color as the pencil shaft. Stack the Fly Stitches closely with the tip facing up to create a the tip of the pencil.
- Remove the Running Stitches that outline the pencil shape.
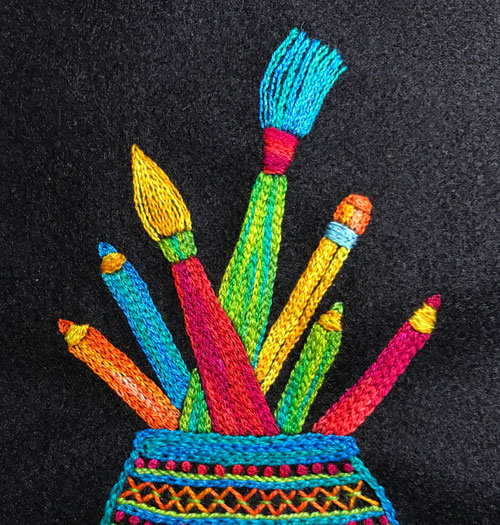
- Repeat the above steps to fill in the remaining 3 colored pencils. Use size 12 threads (like Aquamarine, Lettuce, and Red Hots).
- Stitch Chain Stitches to outline the handle on the tall paint brush shape following the Running Stitches. Use a size 12 thread (like Lettuce.)
- Fill in the handle shape with vertical rows of Chain Stitches placed right next to each other.
- Stitch horizontal rows of Chain Stitches to fill in the ferrule of the paint brush. Use a size 12 thread (like Red Hots).
- Fill in the bristle shape with vertical rows rows of Stem Stitches. Use a size 12 thread (like Aquamarine).
- Remove the Running Stitches around the paint brush shape.