

 If you have a pinking blade or pinking shears, you may want to trim your felt fabrics before attaching them to a background fabric. Here you see the light green felt with a pinked edge embellished with festive embroidery. Isn’t that fun! The sequence for stitching these long leaves follows. (See individual stitch directions here.)
- Stitch Blanket Stitches down the straight edge of each leaf securing it to the background fabric.
- Stitch Fly Stitches following the pinked edges of the leaves securing the outside edges.
- Stitch French Knots in the center of each opening between the Fly Stitches.
 The sun in my Felt Like Gardening #3 embroidery is a simple round felt shape embroidered with these stitch combinations:
- Fly Stitches (facing in) around the edge of the sun shape to secure it to the background fabric. French Knots on the tip of each Fly Stitch.
- Straight Stitches inside each “V” of the Fly Stitch.
- Chain Stitches around the sun stitched on the background fabric.
- Fly Stitches (facing out) around the edge of the sun stitched on the background fabric..
- French Knots on the tip of each Fly Stitch.
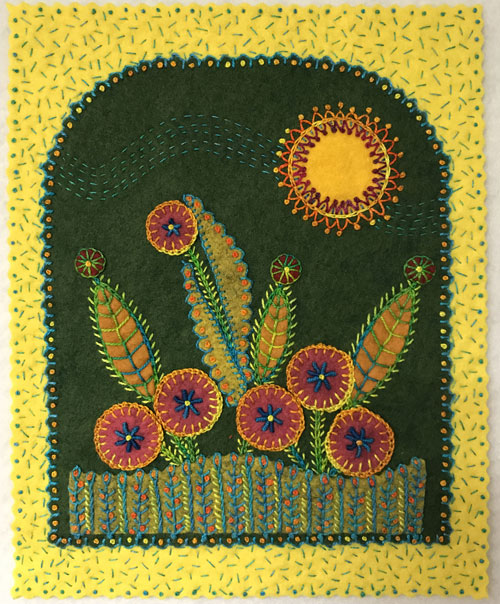
Felt Like Gardening #3 by Laura Wasilowski
I hope you enjoyed seeing how this small embroidery was made. The felt fabric made it easy to stitch and the time doing the embroidery really did give me a feeling of serenity and joy. May you enjoy your stitching to!