

 Thank you all for joining me in making this little fused art quilt from start to finish. Soon you will earn your coveted diploma from the Chicago School of Fusing!
A list of all the tools and materials for our project is found on the Home, Sweet Home Tutorial page.
In today’s lesson, we begin by fusing the fabrics. (If you’ve purchased the fabric part of a Home Sweet Home Stitch Kit, your fabric is already fused.
Lucky you! You may skip to Step #3.)
(Note that directions are first given here on the Artfabrik blog and then added to the Home, Sweet Home Tutorial page as we go.)
Step #2 Fusing the Fabric
- If you’ve purchased a pre-fused fabric kit please skip to Step #3.
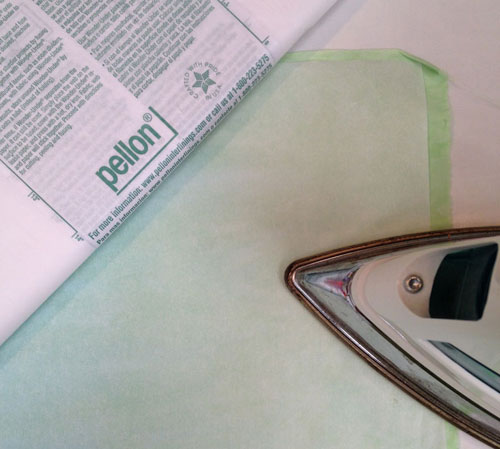
- Cut the fusible web slightly smaller than the fabric. Suggested fusible webs are: Pellon Wonder Under paper backed #805, Soft Fuse, or Misty Fuse (used with parchment paper). Please note that some other brands of fusible web are tacky and will be difficult to hand embroider.
- Place the fabric on the ironing surface then put the rough side or glue side of the paper on top. (If using Misty Fuse, place the web on the fabric and cover the web with parchment paper.)
- Transfer the fusible web to the fabric using a hot (cotton setting), dry iron.
- Glide the iron across the paper from edge to edge for about 5 seconds in each spot. Go to the edge and beyond!
- Note that fabric that bubbles or ripples when fused will flatten out when the paper is peeled off.
- If the web separates from the paper, place the web on the fabric with release paper on top and fuse.
Step #3 Silicone Release Paper
- Let the fabric and web cool 5- 20 minutes before removing the paper. The fused fabric should feel dry, not tacky.
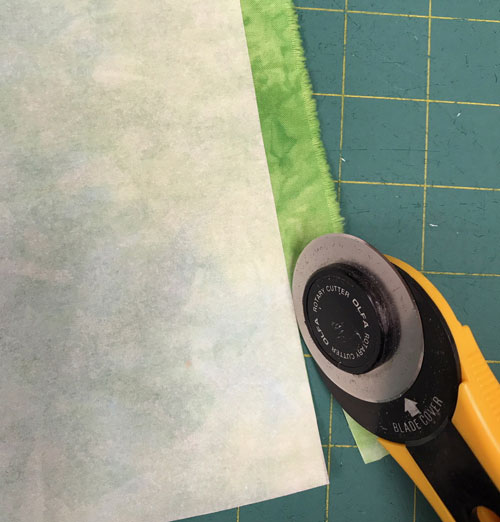
- Before removing the paper, separate the fabric from the paper at one corner. Then trim the non-fused fabric off by following the paper’s edge. Peel the paper off without ripping it. Save the paper.
- The paper you’ve just removed is called silicone release paper. It has a silicone coating and can be used to: 1. assemble fused collages and compositions, 2. build design elements as a unit, 3. store fused fabric scraps, 4. place on top of compositions to protect them from dirty irons and, 5. transfer shapes to fused fabrics.
- Parchment (or baking) paper is similar to release paper and can be used in place of release paper. Test the paper first by ironing a piece of fused fabric to it. The fabric should easily release or come off the paper.
- Either side of silicone release paper or most parchment papers is usable for fusing. Please note, however, that on some versions of fusible web only the “shiny” side of the paper is usable as release paper.
- Both parchment paper and release paper can be used for assembling quilt tops, fused collages, storing fused scraps, protecting the ironing board, and pattern transfer.
- Peel the paper off the fused fabric before cutting shapes. Paper dulls scissors and cutting blades. Also fabric edges may fray if paper is peeled off a cut shape.