


Your Home, Sweet Home quilt top is complete and you are happy as a clam in white wine! Next up is preparing the quilt top for hand embroidery and adding stitchery.
See how the hand embroidery really brings the quilt to life? It adds texture, pattern, and those fine details you can’t get with fabric alone. For this quilt, we use only 4 thread colors in size 12 pearl cotton. Even with these few colors you can see how hand stitchery outlines shapes, repeats color, and takes your quilt from flat to fabulous!
(Note that directions are first given here on the Artfabrik blog and then added to the Home, Sweet Home Tutorial page as we go.)
Step #13
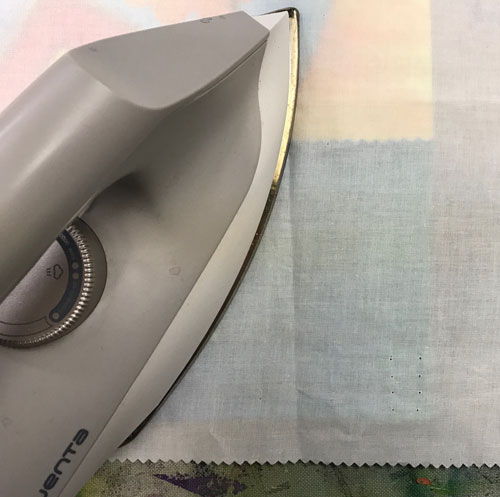
- Remove the quilt top from the paper. Place the glue side of the composition on to the non-scrim side of the batting. It is important the glue does not touch the scrim or you’ll get a ripply quilt. See How to Determine the Scrim Side of Batting.
- Cover the quilt and batting with a dry pressing cloth. Iron the quilt to the batting using a steam iron. Set the steam iron to the cotton setting and steam the top for 10 seconds in each spot to set the glue. Wiggle the iron so you don’t get the shape of the iron on the quilt top.
Step #14

- Add hand embroidery stitches through just the batting and quilt top layers Do not put the backing on the quilt yet.
- Stitch straight stitches vertically and horizontally across each window to make the window panes. Use a size 12 thread (like Oranges) and a size 5 or 7 embroidery needle.
- Stitch a French Knot on the door to make the doorknob and stitch Blanket Stitches around the door using the same thread color as the windows.
- Stitch Chain Stitches around each window to outline them. Stitch right next to the window shape on the house fabric. Use a size 12 thread (like Lettuce).
Step #15
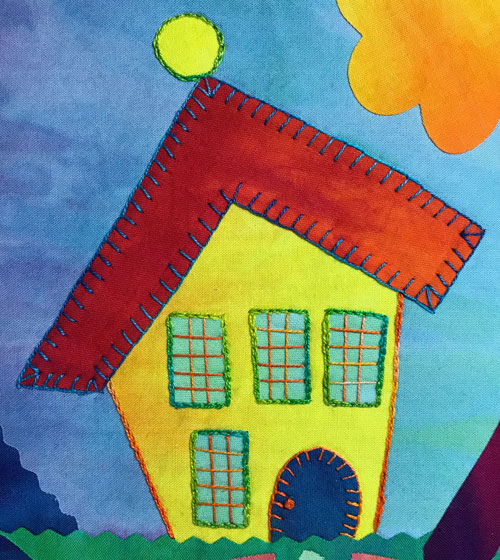
- Stitch Chain Stitches on each side edge of the house to outline the house. Use a size 12 thread (like Oranges).
- Stitch Blanket Stitches around the edge of the roof shape. Use a size 12 thread (like Degas Blue).
- Stitch Chain Stitches around the house dot to outline it. Use a size 12 thread (like Lettuce).