Home in the Country Stitch-Along #6

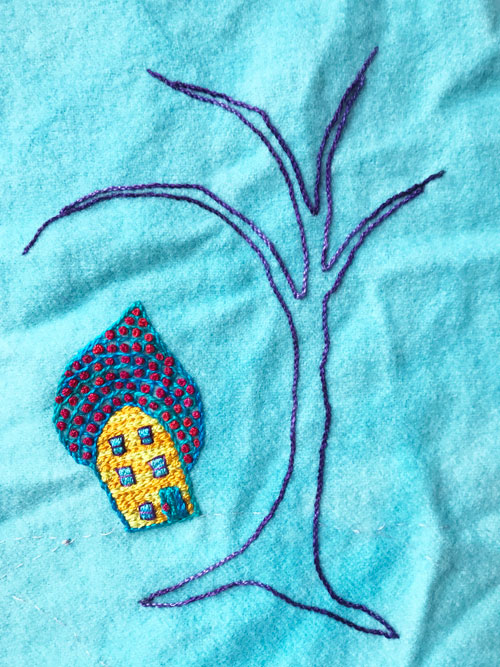
For the most part, we’ve used a size 8 pearl cotton thread to stitch our Home in the Country free-form embroidery. It’s a bold thread that sits upon the wool fabric, creating lots of texture.

But to make the curves and eddies of the water, we need a finer thread. So to make these fine lines, we’ll use a size 12 pearl cotton and the stem stitch.

Please note that directions are added to the Home in the Country Stitch-Along page as we go. They are first posted here on the Artfabrik blog.

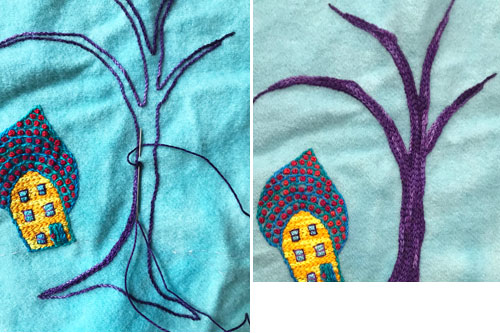
Step #6- Stitching the Water

  • Stitch Stem Stitches following the curvy line of running stitches below the fields to make the edge of the water.
  • Use a size 12 pearl cotton thread (like Aquamarine) and a size 5 hand embroidery needle.
  • Stitch to within 1/4″ of the edges of the fabric.
  • Remove the running stitches.
  • Stitch Stem Stitches in curvy horizontal lines across the fabric to make waves of water using that same thread.
  • Stitch spirals of stem stitches to create eddies of water.
  • Stitch to within 1/4″ of the edges of the fabric.
  • Stitch Stem Stitches in curves, spirals, and waves down to within 1/4″ of the bottom edge of the fabric to fill in the water shape.

Home in the Country Stitch-Along #5

What’s a Home in the Country without a few fields in the landscape? In this step, we are adding 3 fields beginning with the center field. These stitches give us the basic structure of the fields. We’ll add more detail to them later.

Please note that directions are added to the Home in the Country Stitch-Along page after they are first posted here on the Artfabrik blog. You can join anytime.

Step #5- Stitching the Fields

  • Stitch Chain Stitches to outline the top of the center field shape following the running stitches.
  • Use a size 8 pearl cotton thread (like Lime Frappe) and a size 3 hand embroidery needle.
  • Stitch to within 1/4″ of the edge of the fabric on the right.
  • Stitch lines of Chain Stitches that taper from the top edge of the center field shape down to the running stitches marking the bottom edge of the field using that same thread.
  • Stitch to within 1/4″ of the edge of the fabric on the right.
  • Stitch a row of Long and Short Stitches across the top right side of the center field to make the right field.
  • Use a size 8 thread (like Butter).
  • Stitch to within 1/4″ of the edge of the fabric on the right.
  • Continue to add Long and Short Stitches across the right field up to the running stitches that mark the top of the field.
  • Use a variegated size 8 thread (like Sunrise).
  • Stitch to within 1/4″ of the edge of the fabric on the right.
  • Remove the running stitches.
  • Stitch rows of Lazy Daisy Stitches vertically to fill in the left field.
  • Use a size 8 thread (like Peas in a Pod).
  • Stitch to within 1/4″ of the edge of the fabric on the left.
  • Remove the running stitches.

Home in the Country Stitch-Along #4

As we begin the next stage of stitching Home in the Country, I find I’m drawn to this variegated red violet thread called Grape Juice. And I think it will work perfectly to create the bark for that giant tree embracing the tiny home in the design. I mean, who doesn’t love a purple tree?

In this step we outline the tree trunk shape and then fill it in. You’ll notice that the Grape Juice variegated thread gives the tree dimension with it’s light and dark values of purple.

Please note that directions are added to the Home in the Country Stitch-Along page after they are first posted here on the Artfabrik blog. You can join anytime.

Step #4- Stitching the Tree

  • Stitch Stem Stitches to outline the tree trunk shape following the Running Stitches.
  • Use a size 8 pearl cotton thread (like Grape Juice) and a size 3 hand embroidery needle.
  • Remove the running stitches.
  • Stitch Chain Stitches vertically in close rows inside the tree trunk shape to fill it in using that same color of thread.